I am trying to transfer base64 images from a website to Notes using HTML. As a test, iv’e written the script below which gets a “normal” image from a website via url. The second image is the base64 code of a simple image of a Red Dot (from Wikipedia). As described in the script comments, the first picture displays correctly in Notes but the second one doesn’t.
Can anybody help me to get both images to display (as images) in the Note when opened please?
Many thanks.
-- Creates a new Note On My Mac with a Body containing: Some text, a random image taken from the web, some more text and a Base64 coded Red Dot (code got from wikipedia).
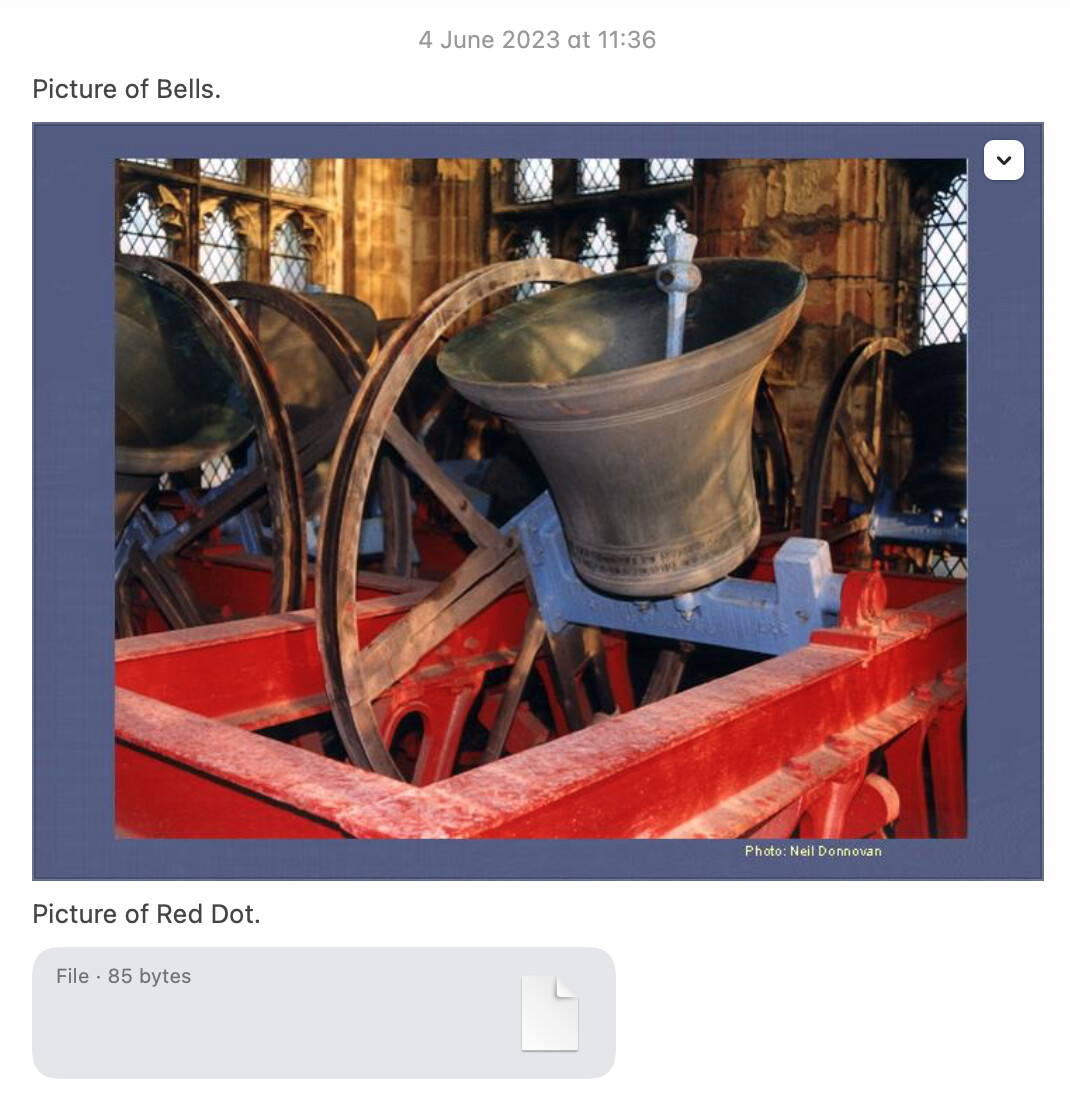
-- The Note is created correctly but only the first image is displayed. The second image is displayed as "File . 85 bytes" and will only display as an image if double clicked.
-- When it does display, it opens in a new Preview window, not in the Note.
tell application "Notes"
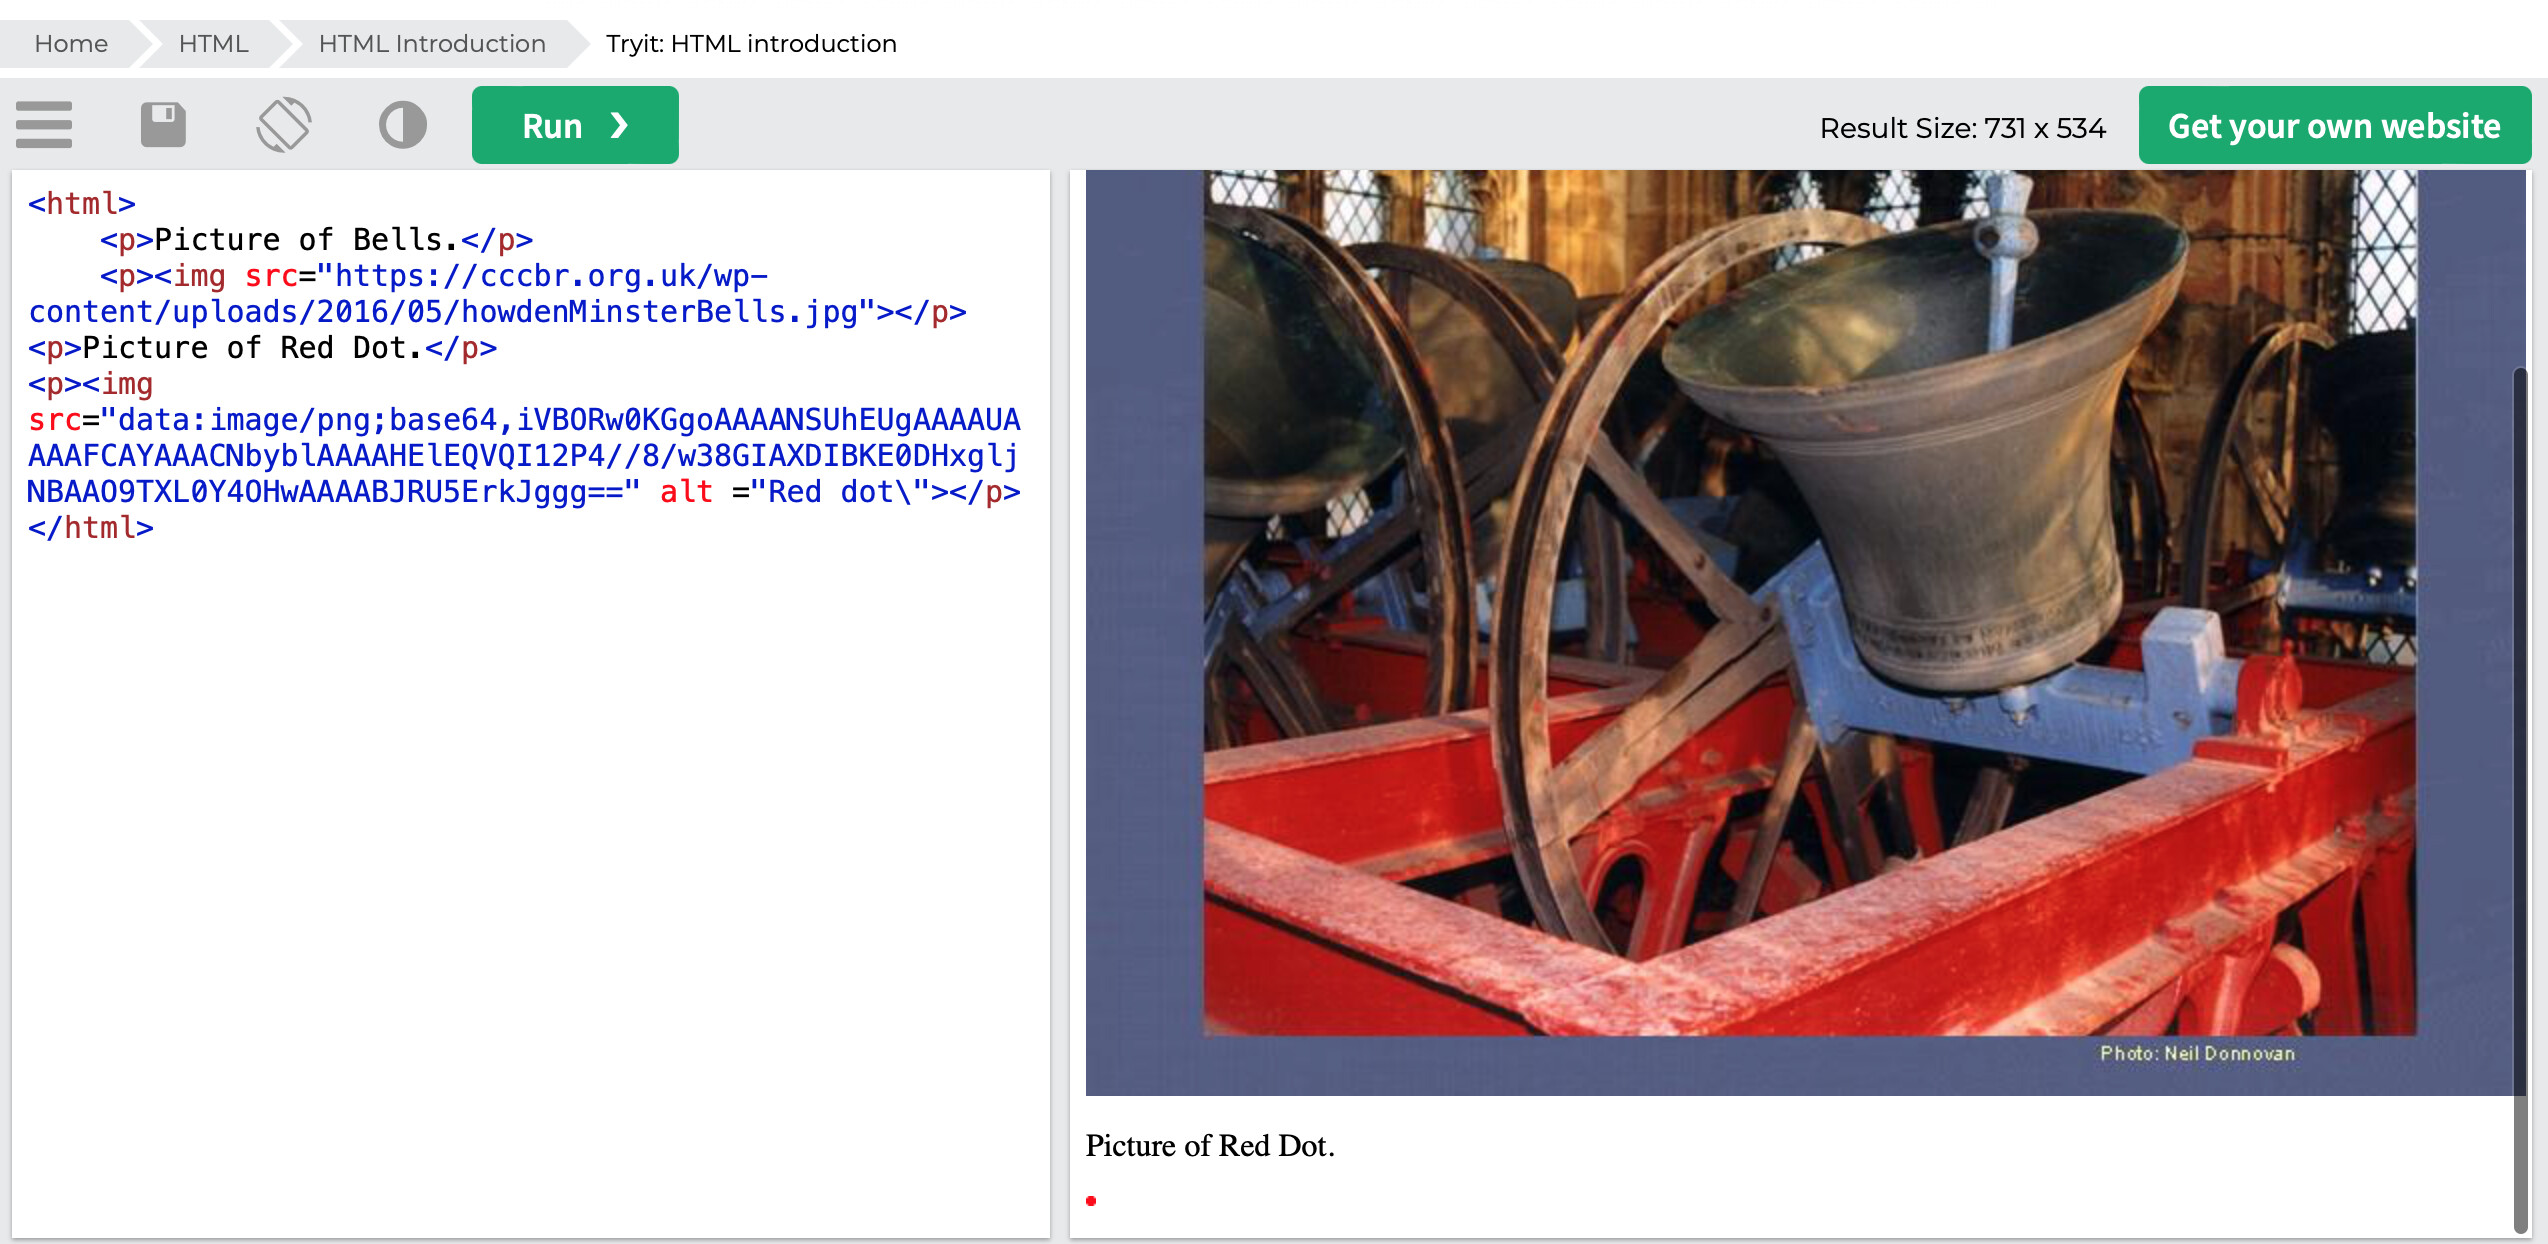
set the noteBody to "<html>
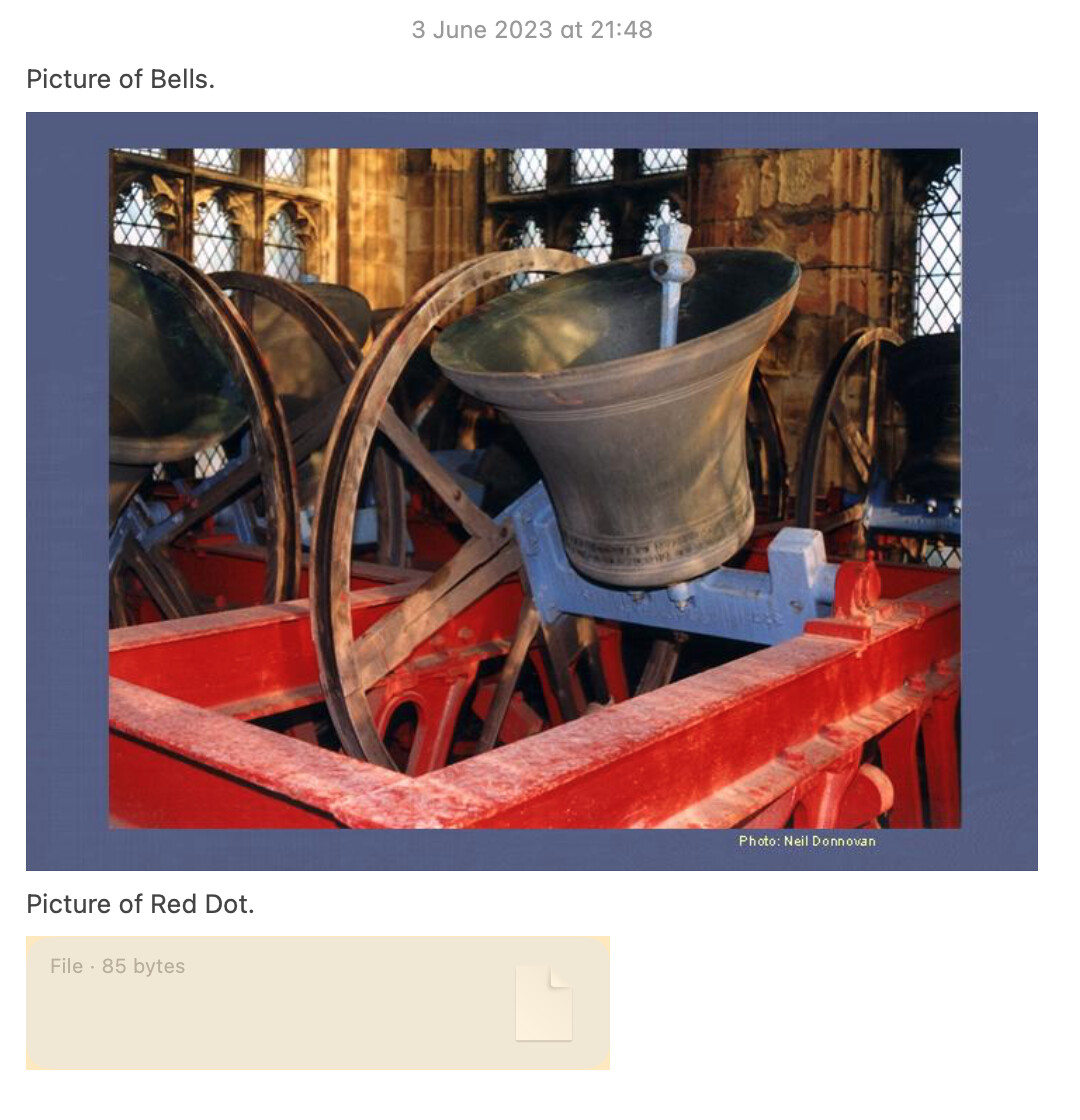
<p>Picture of Bells.<p>
<p><img src=\"https://cccbr.org.uk/wp-content/uploads/2016/05/howdenMinsterBells.jpg\"<p>
<p>Picture of Red Dot.<p>
<p><img src=\"data:image/png;base64, iVBORw0KGgoAAAANSUhEUgAAAAUAAAAFCAYAAACNbyblAAAAHElEQVQI12P4//8/w38GIAXDIBKE0DHxgljNBAAO9TXL0Y4OHwAAAABJRU5ErkJggg==\" alt =\"Red dot\"<p>
</html>"
set thisAccountName to "On My Mac" -- For testing (images appear immediately in the note)
--set thisAccountName to "Icloud" -- (Sometimes a delay for the images to appear)
-- make a new note at the top application-level:
make new note at folder "Notes" of account thisAccountName with properties {body:noteBody}
end tell
noteBody