I wanted to learn a little about the Shortcuts app and decided to write some simple shortcuts. The general process I followed was:
Open the Shortcuts app and select File > New Shortcut.
Click on “Shortcut Name” in the upper-left corner and enter the desired shortcut name.
Search or scroll through actions in the sidebar to find the desired action.
Drag the action found in step 3 into the main window and configure.
After the shortcut is complete, run and make any necessary edits.
Click on the information icon in the upper-right-hand corner of the app, select the Details tab, and enable “Pin in Menu Bar”.
Save the shortcut by closing its window.
Some related information:
The shortcuts are stored in ~/Library/Shortcuts in a database.
You can export and import a shortcut. When exporting, maximum compatibility is achieved by enabling the “Anyone” option.
In most cases, I will provide a screenshot of the shortcut, and a link to a shortcut file, which can be downloaded and installed. If a shortcut is downloaded and installed, you will be prompted to set permissions the first time the shortcut is run.
The context menu for a shortcut contains an option to place the shortcut in the dock, which can be a convenient method to run a frequently-used shortcut.
One of the biggest issues I’ve encountered in running Shortcuts is assigning them a keyboard shortcut. This can be done with a Quick Action, but it doesn’t seem to work very well in my experience. An alternative that is somewhat better in preliminary testing is to create an AppleScript, which I then run by way of FastScripts.
tell application "Shortcuts Events" to run shortcut named "Tile Apps"
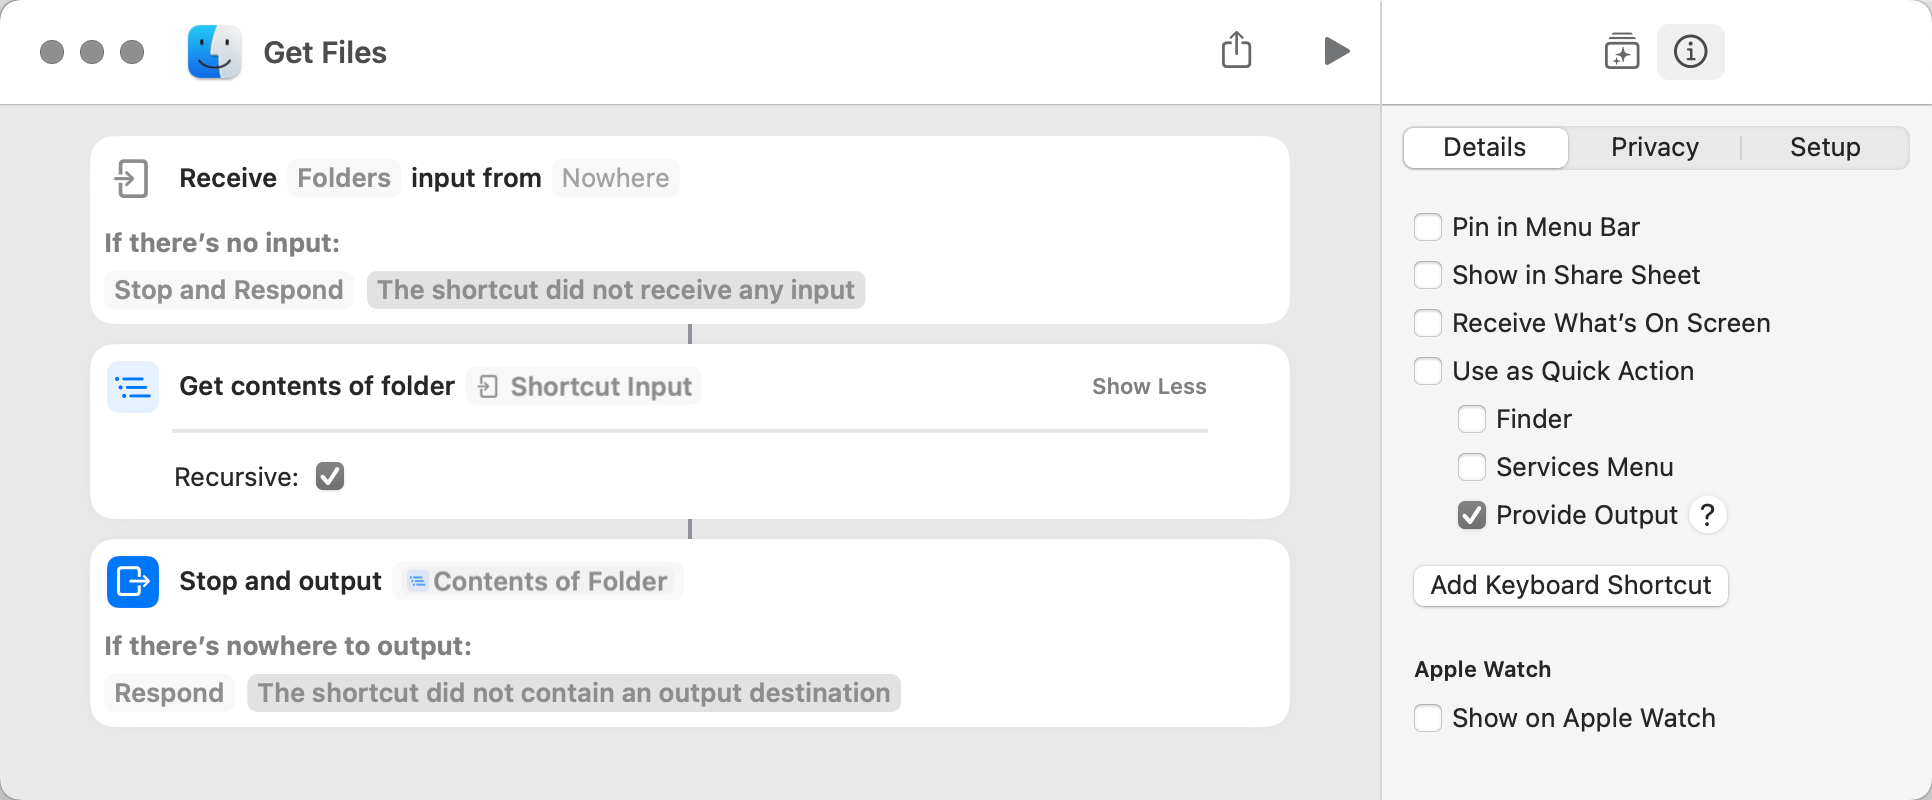
The Late Night Software forum contains a thread (by Dirk) that discusses passing a parameter to a shortcut and getting the result back (it can be found here). I decided to investigate how this might work in one use scenario.
The AppleScript is:
set theFolder to (choose folder)
tell application "Shortcuts Events"
	set theFiles to (run shortcut named "Get Files" with input theFolder)
end tell
The shortcut returns a list of aliases of files in the target folder and its subfolders, and the timing result with a folder that contained 395 files in 85 folders was 1.214 second, which is clearly a poor result. However, this same general approach could be useful in calling regular macOS apps.
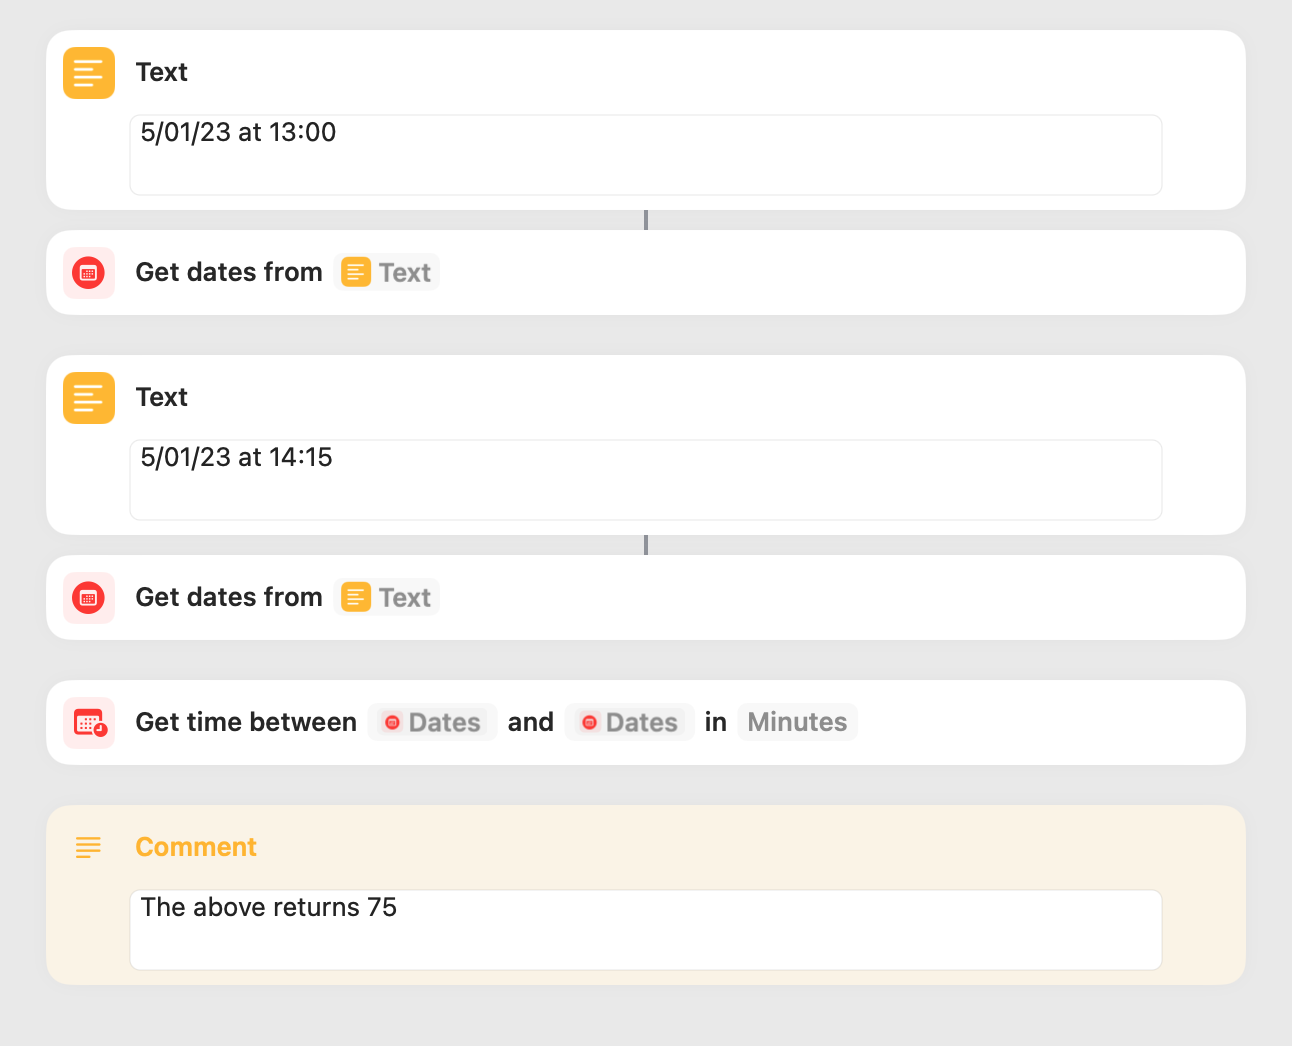
I spent some time investigating date handling in Shortcuts and thought I would summarize available actions.
Date. Returns the current date and time.
Format Date. Separate options are provided for date and time, and these options include none (nothing is returned), short, medium, long, and custom.
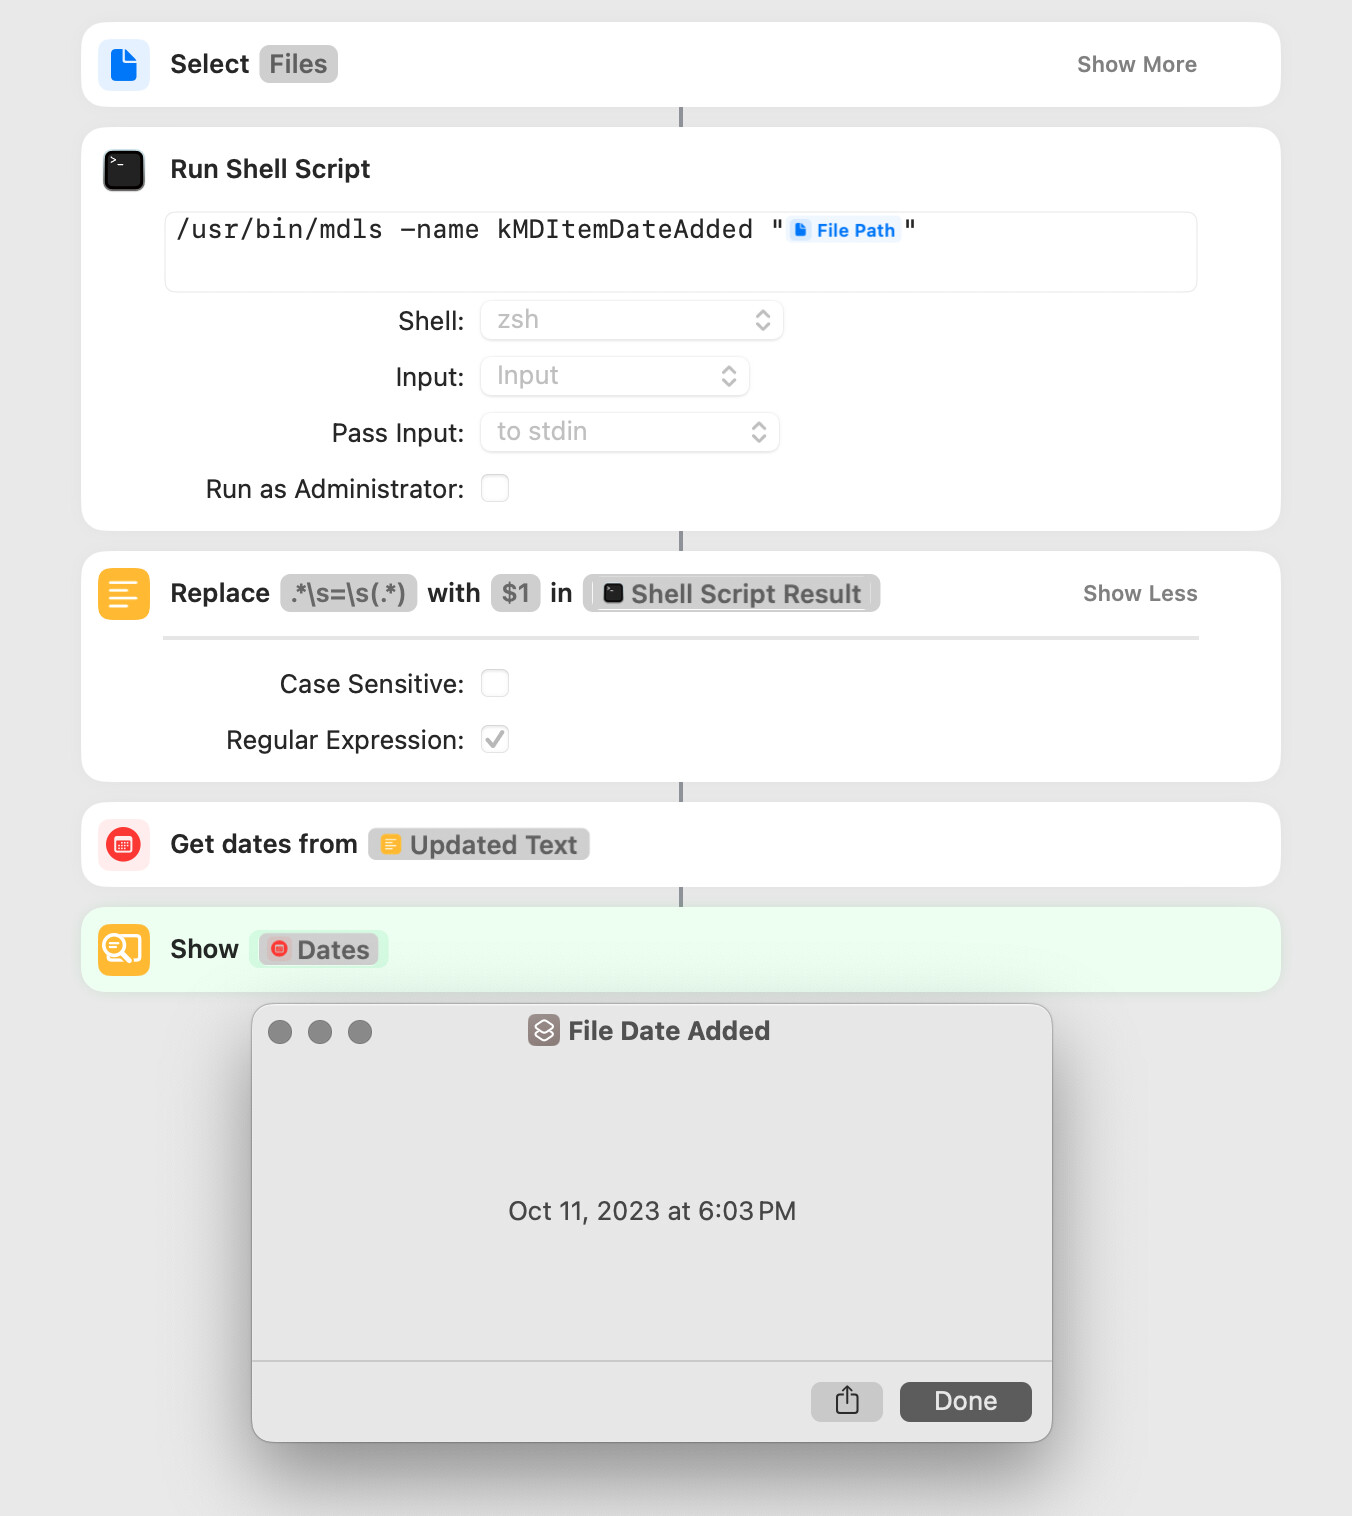
Get Dates from Input. This action gets a date from a large number of inputs including text, calendar events, weather conditions, and iTunes and photo media.
Convert Time Zone. Change a date from a specified time zone to a specified time zone. In limited testing, this action appears to respect Daylight Savings Time.
Adjust Date. Add a specified number of date or time intervals to a date.
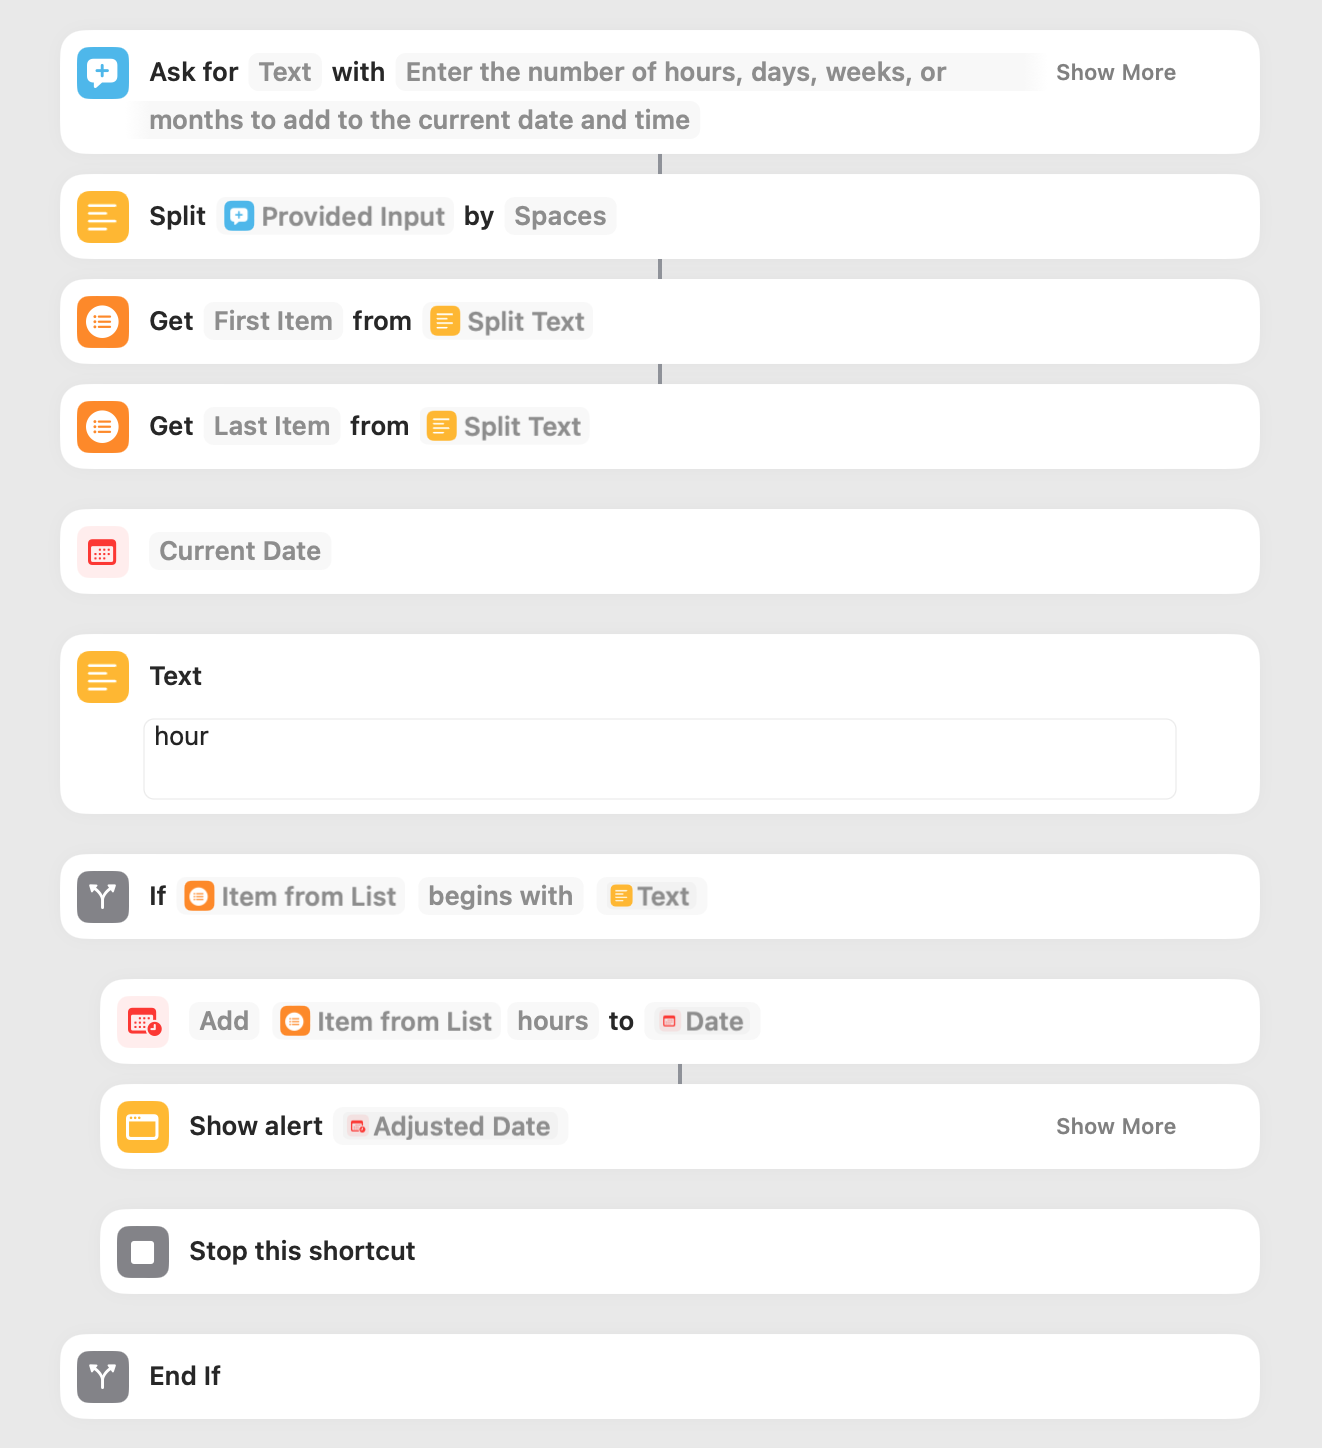
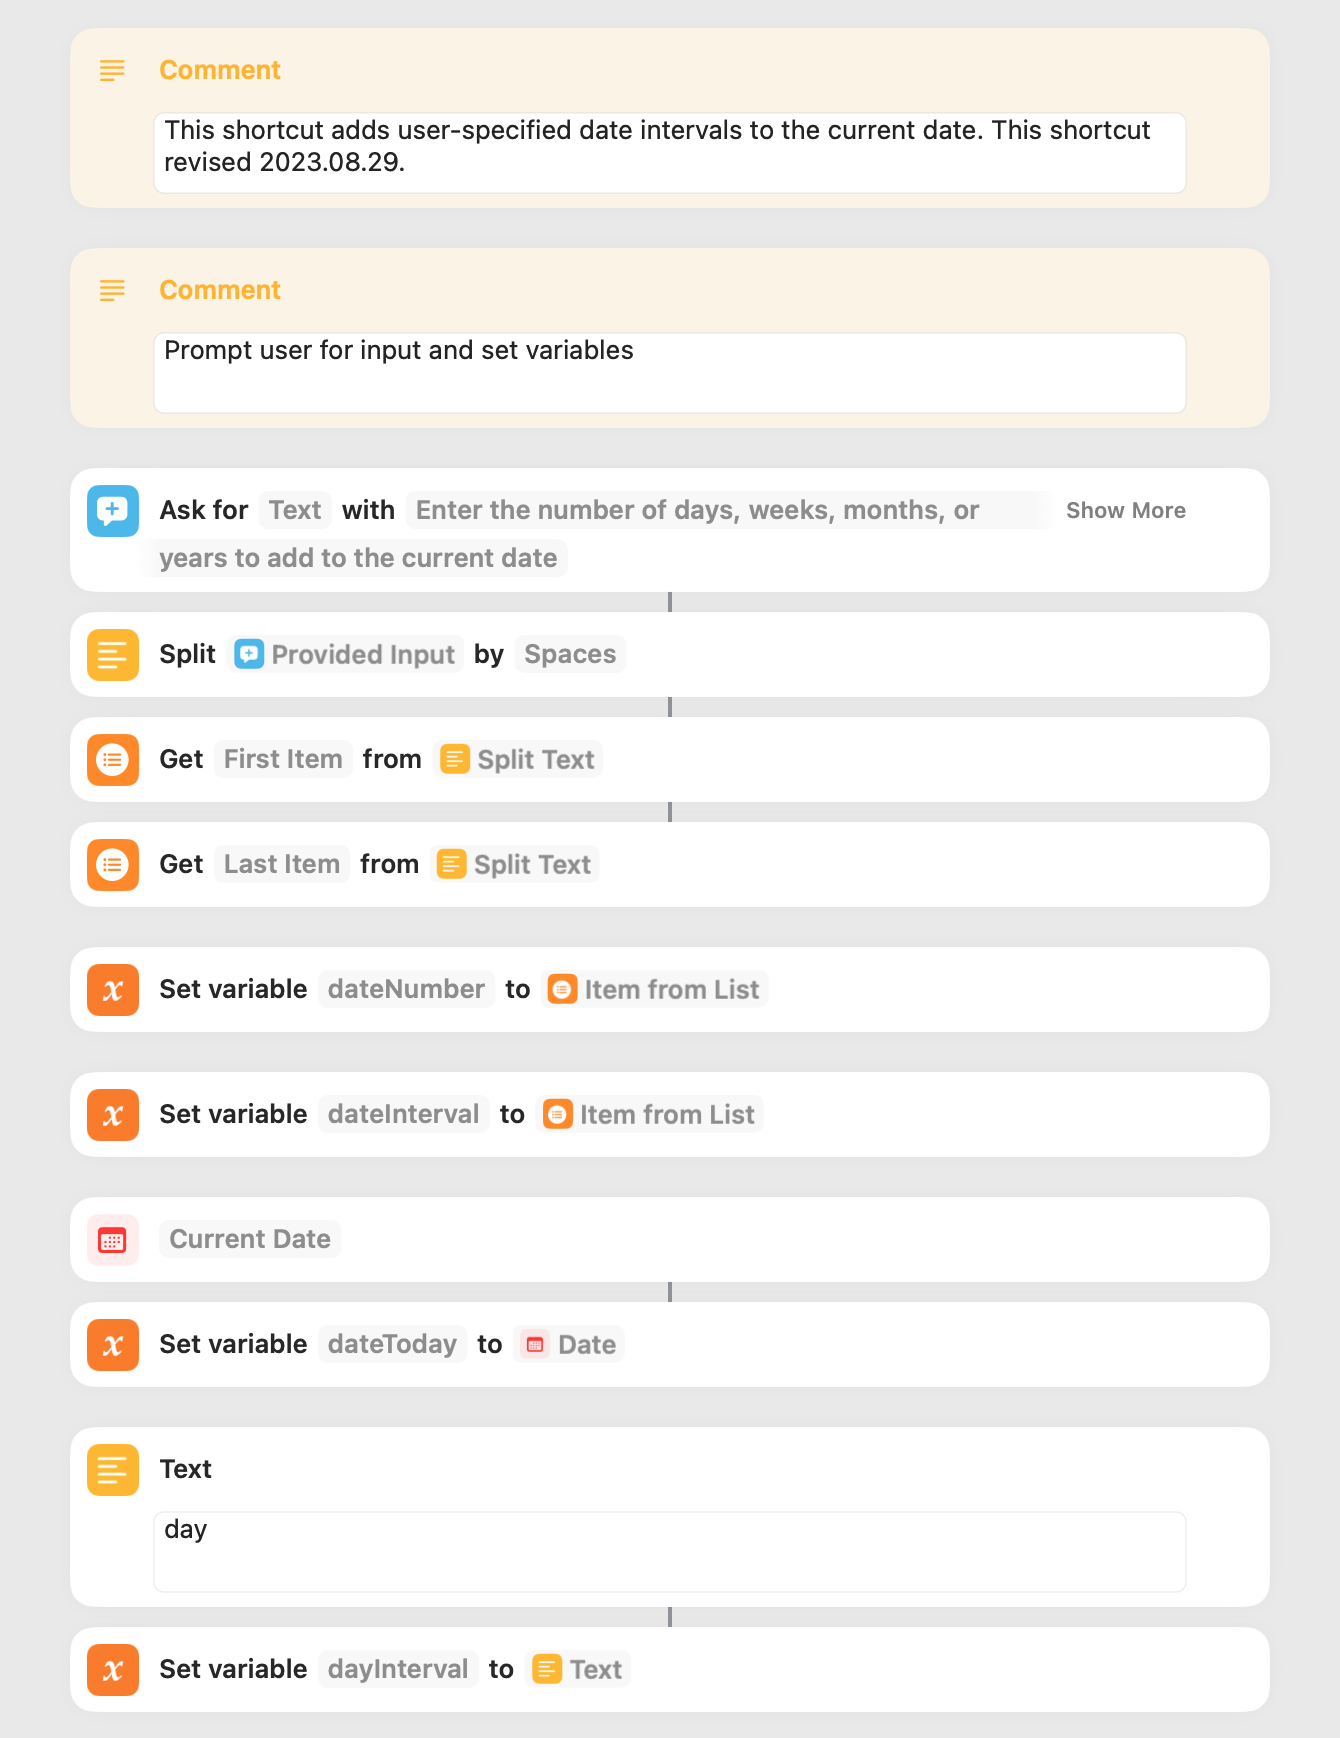
The following shortcut adds a user-specified time interval to the current date. I wrote this primarily to demonstrate two issues.
Apple encourages the use of Magic (unnamed) Variables, which makes it unnecessary to formally set the output of an action to a Manual Variable. This contributes to code brevity but can make a shortcut difficult to follow. The shortcut contained below uses Magic Variables only.
The Shortcuts app has an if…otherwise…endif statement but that’s all. The workarounds are to nest if statements (which is clumsy), to use multiple consecutive if statements (which can be inefficient), and to use a repeat loop (which doesn’t always work). The shortcut included below use multiple consecutive if statements and doesn’t suffer any inefficiency as a result.
Apple states that “a shortcut is a quick way to get one or more tasks done with your apps.” I wasn’t sure how to accomplish this in all circumstances and thought I would quickly summarize what I’ve learned.
You can create shortcuts for specific apps, and a simple example is one that directs the Music app to play a particular song. Shortcuts that fall in this category are run by any of methods described in earlier posts (for example the Shortcuts Menu).
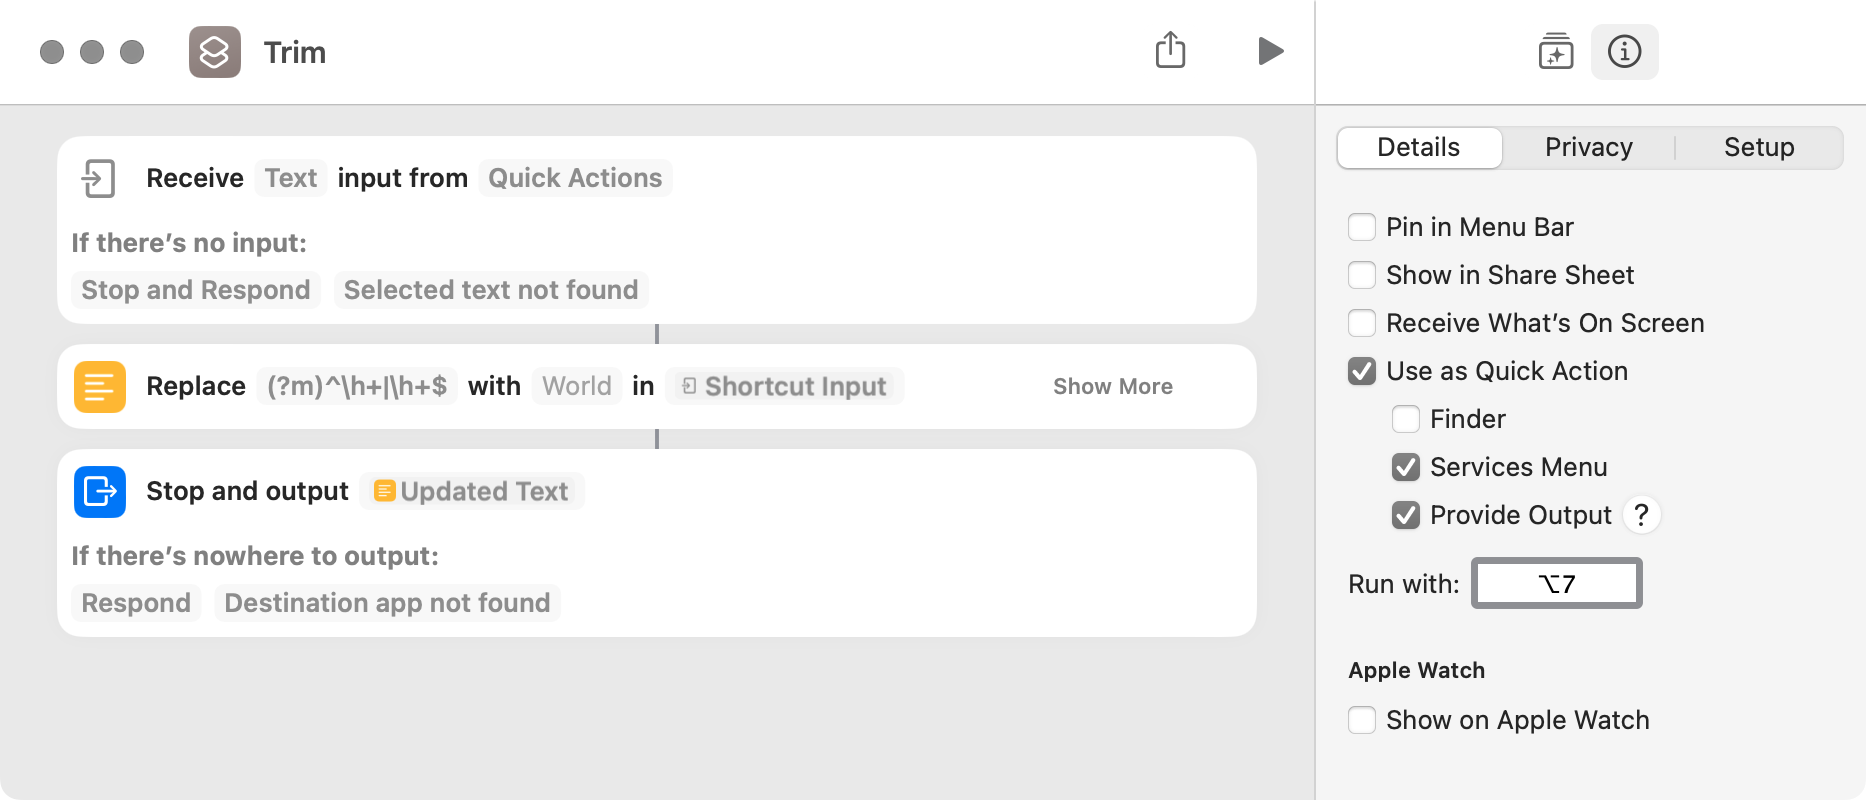
You can also write a shortcut that gets input from a running app and then outputs to the app. The following shortcut–which alphabetically sorts lines of selected text–is a good example. This shortcut can be run by way of an app’s Services menu or a keyboard shortcut but not by way of the Shortcuts Menu or a dock icon.
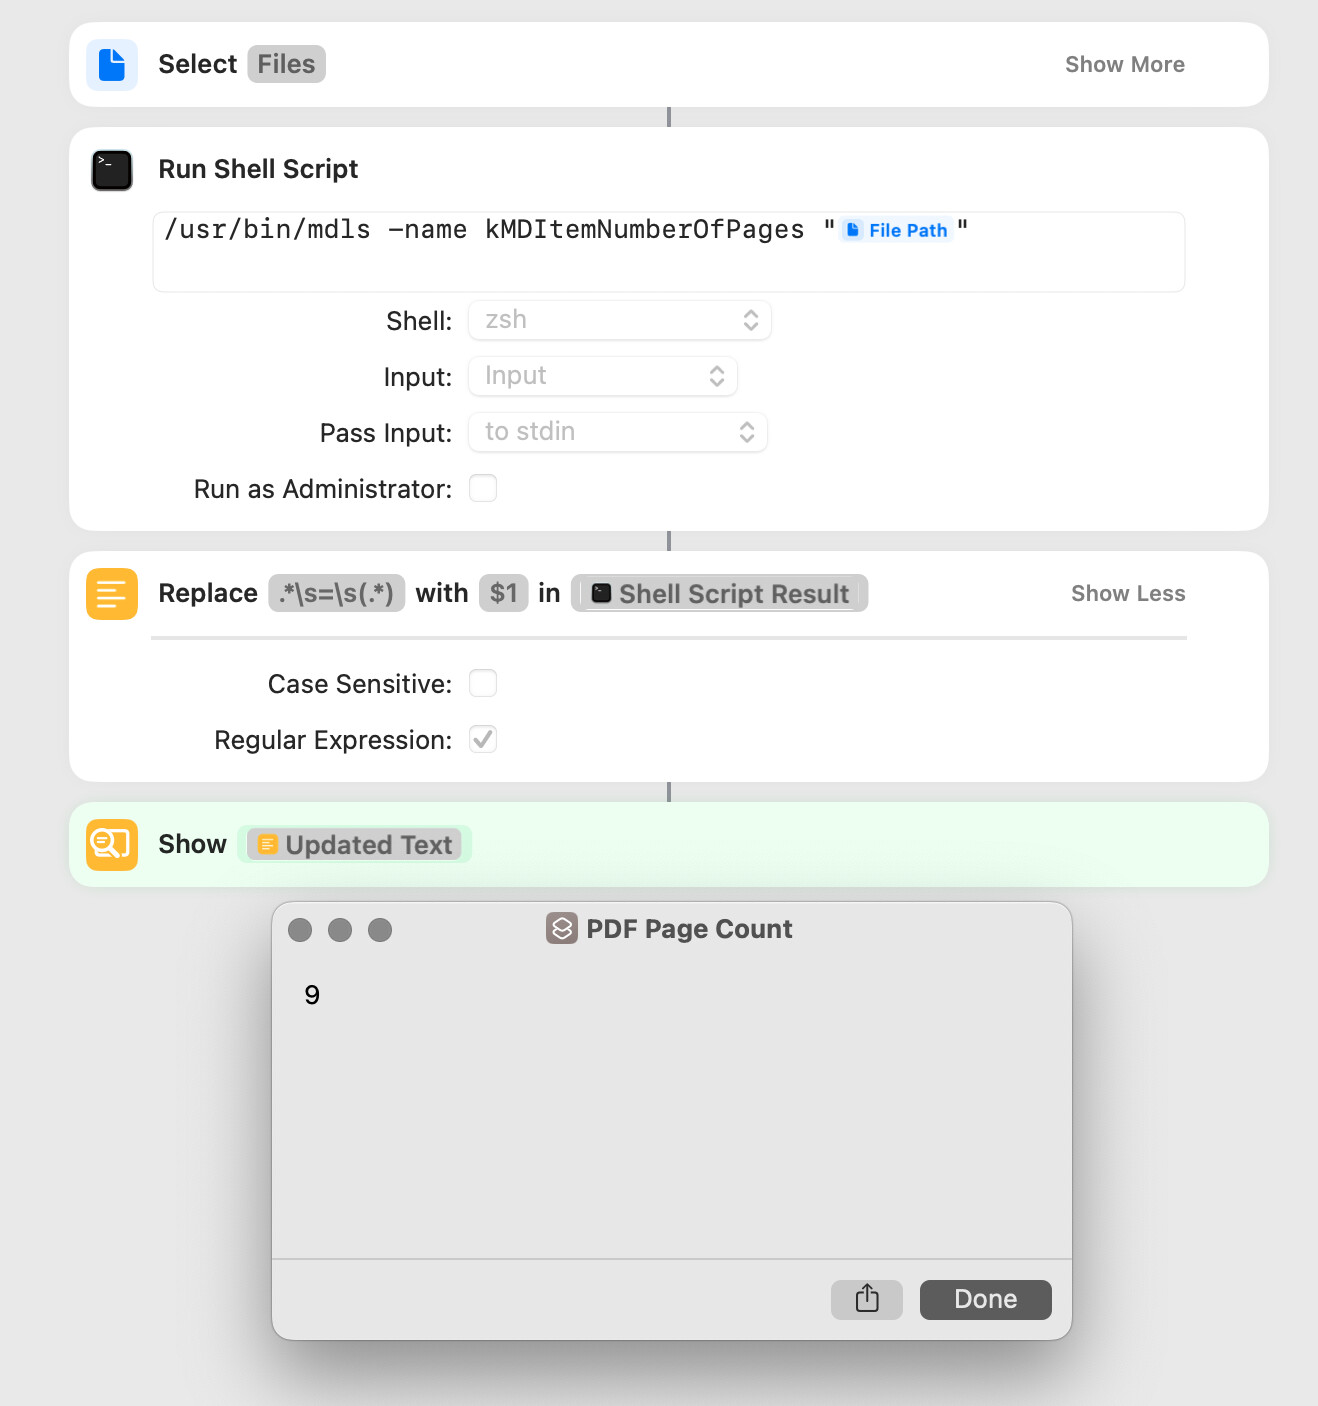
The Shortcuts app has a search and replace action, and it includes support for regular expressions. The following removes all leading and trailing horizontal whitespace in input text. The word World is a placeholder only.
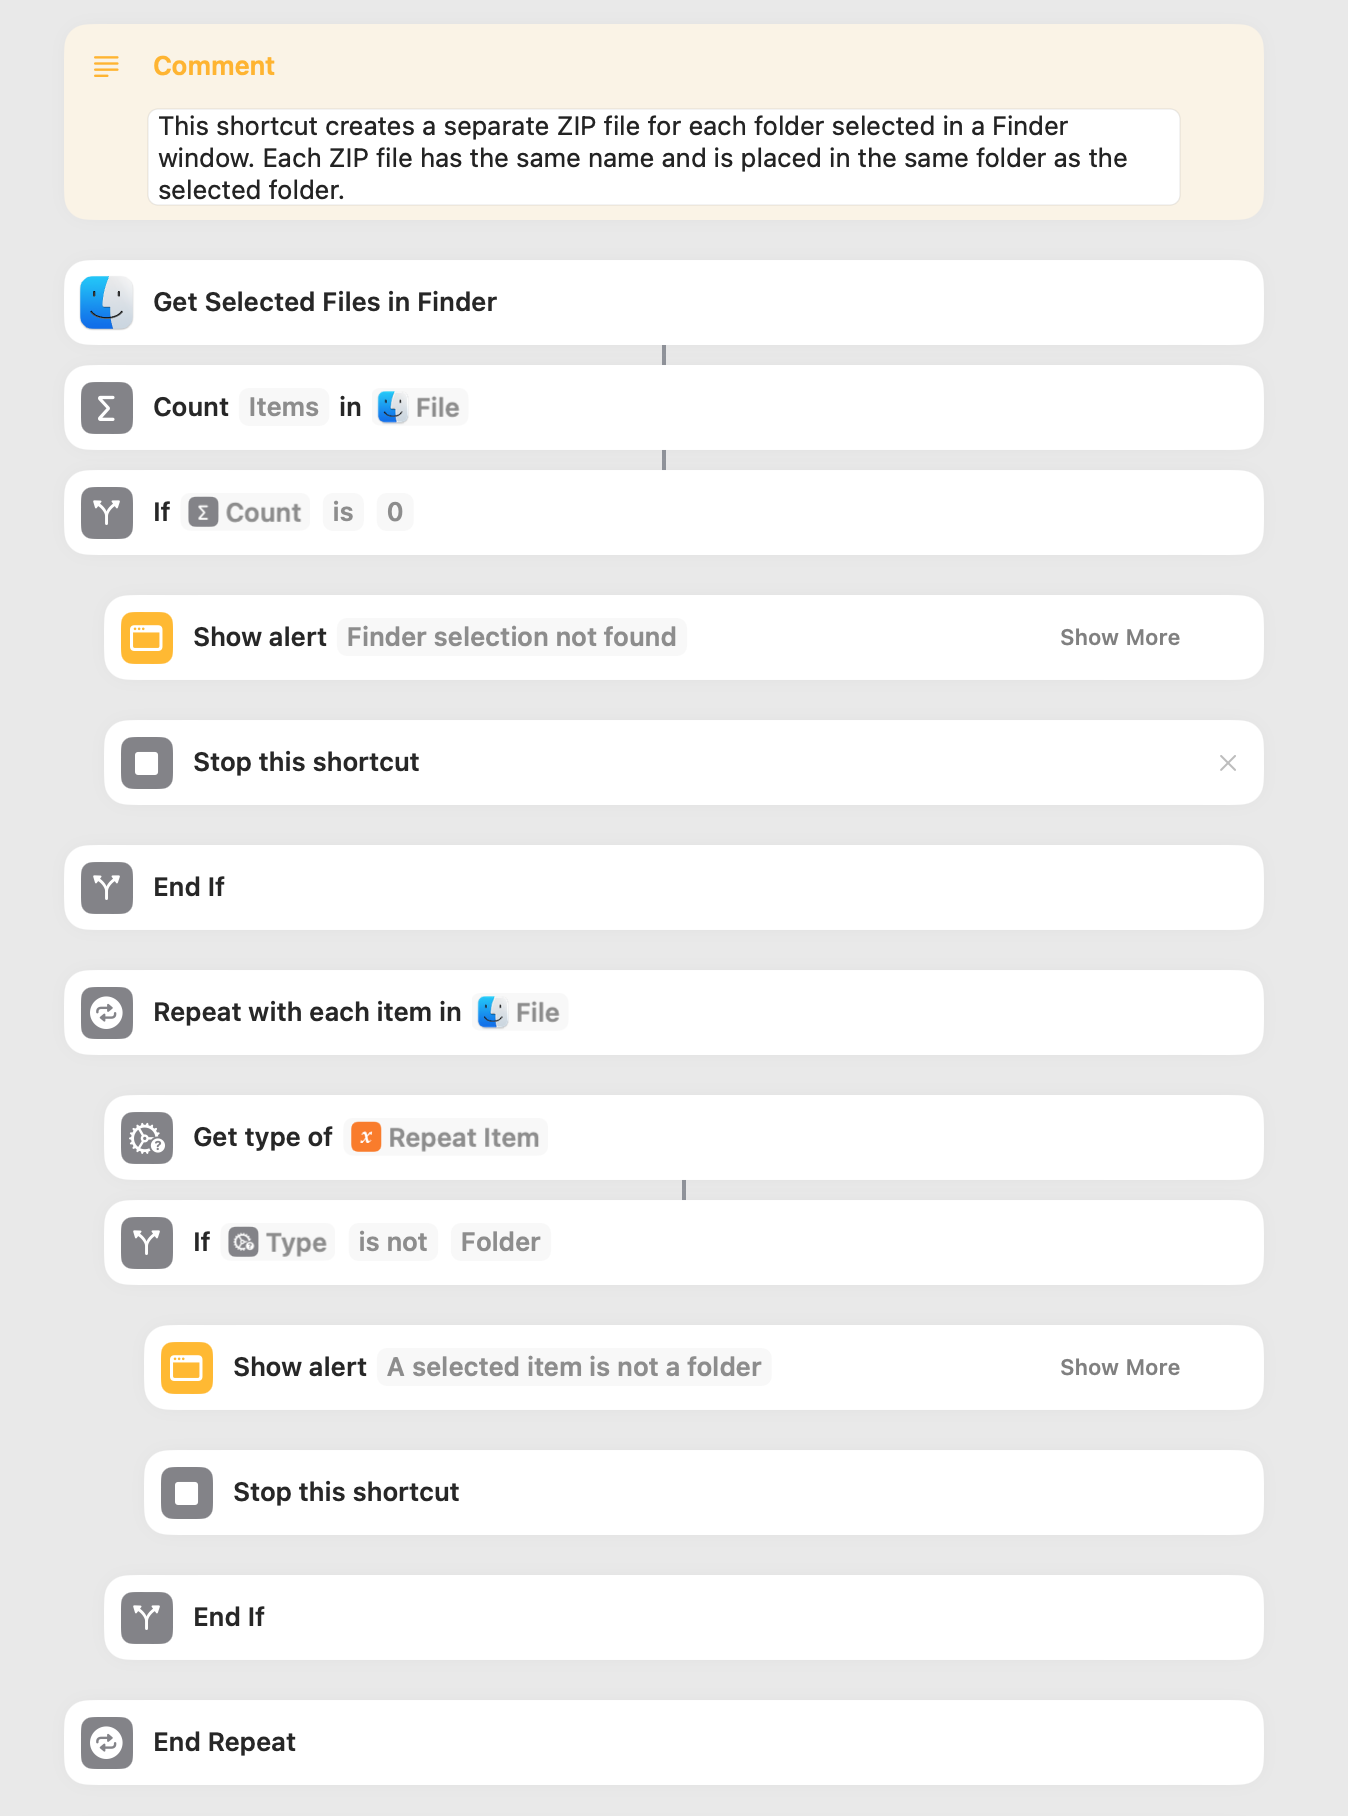
A while back, a forum member requested help with an AppleScript that created an individual archive of a large number of selected folders (here). Just for learning purposes, I wrote a Shortcut solution. Please note that the following screenshot only shows a portion of the shortcut.
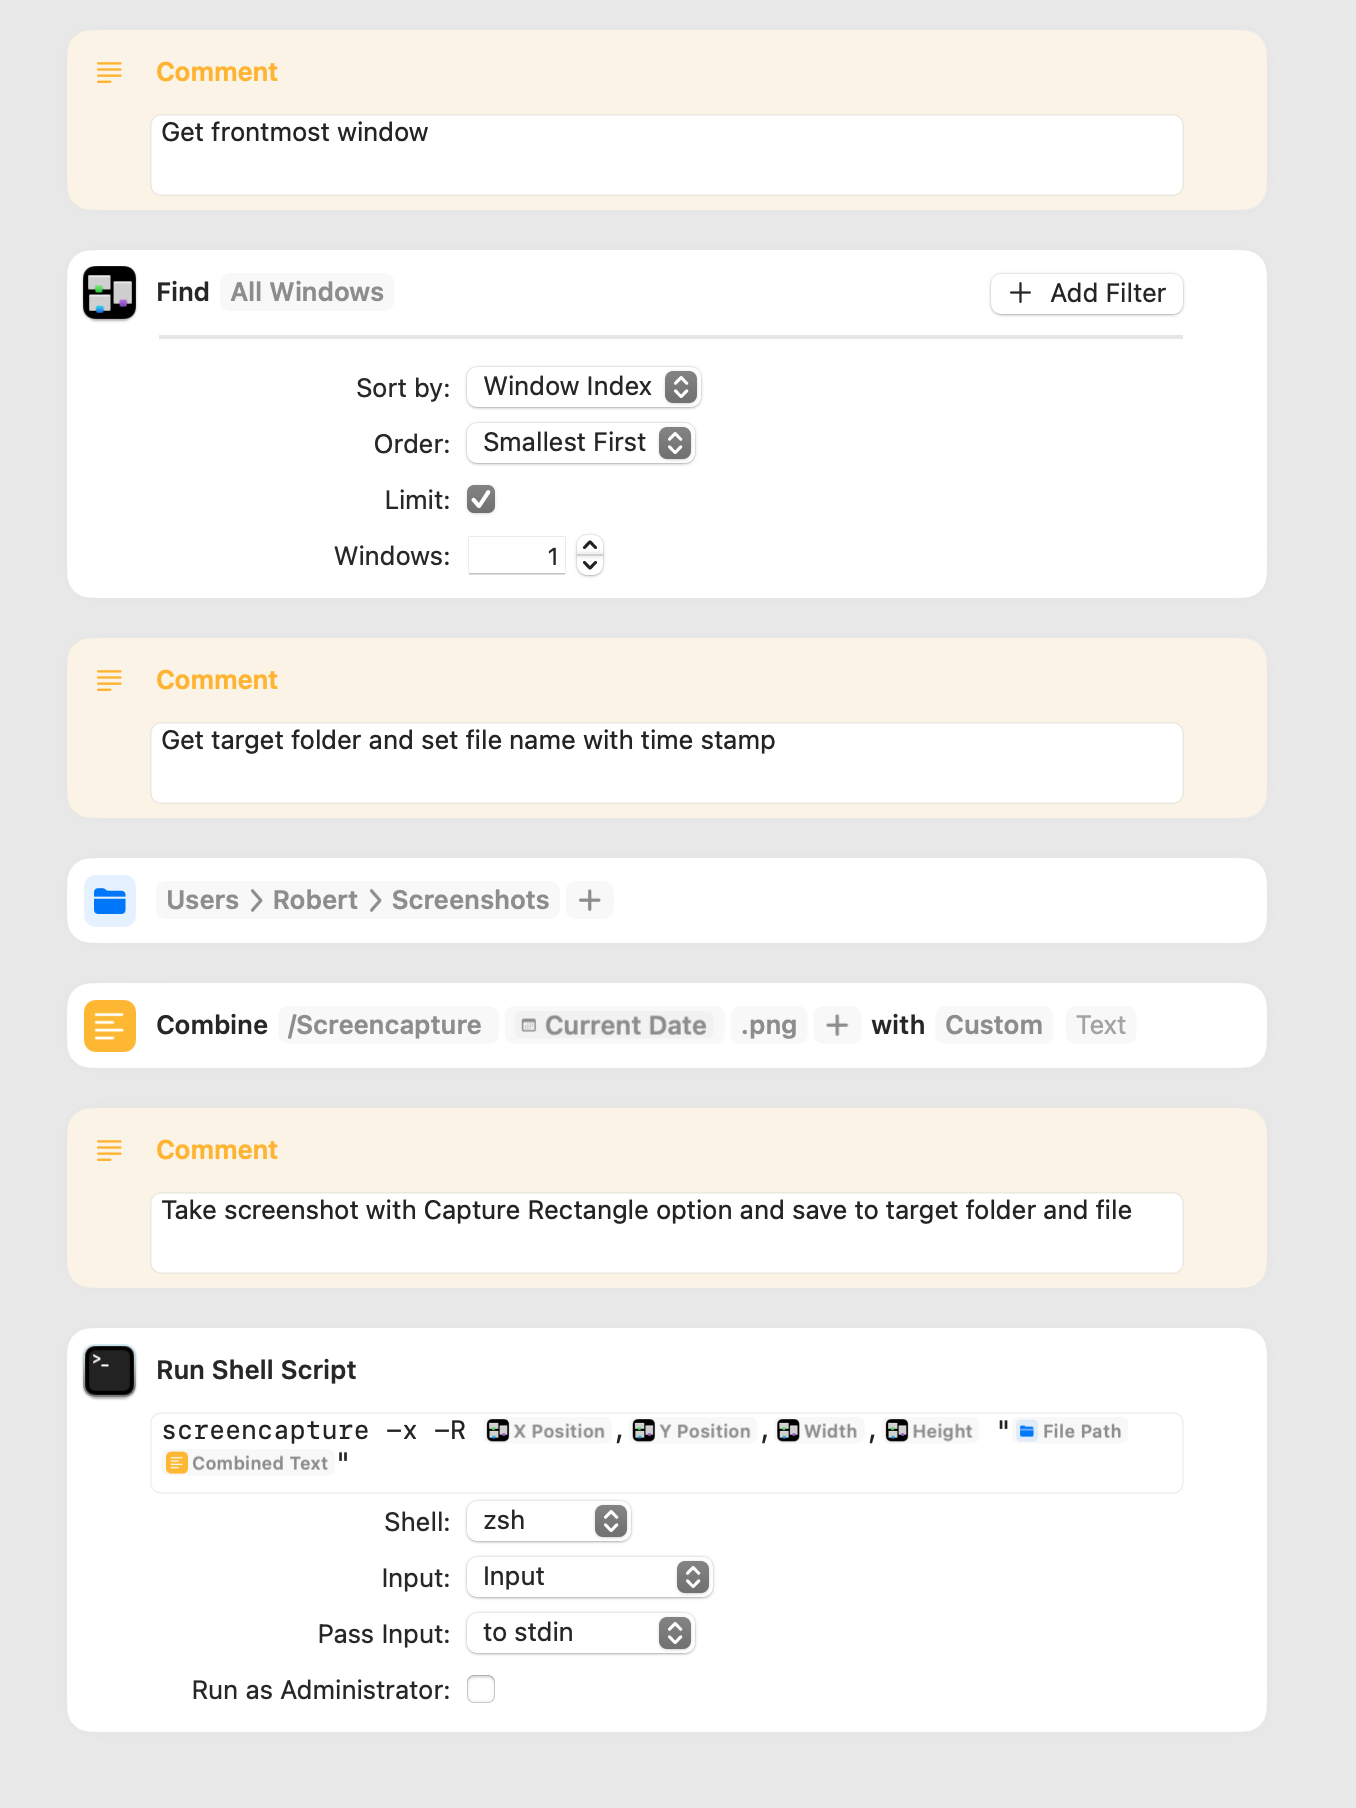
Before moving on, I thought I would add a mea culpa regarding Magic Variables. At first I took these to be little more than unnamed variables that are available throughout a shortcut. They are that, but they also allow you to directly access the properties of items.
The above is demonstrated in the shortcut contained below where all of the following are used without setting a single variable:
The x- and y-position of the frontmost window.
The width and height of the frontmost window.
The current time with a custom format.
Some users will prefer to set variables directly, but Magic Variables are a worthwhile alternative.
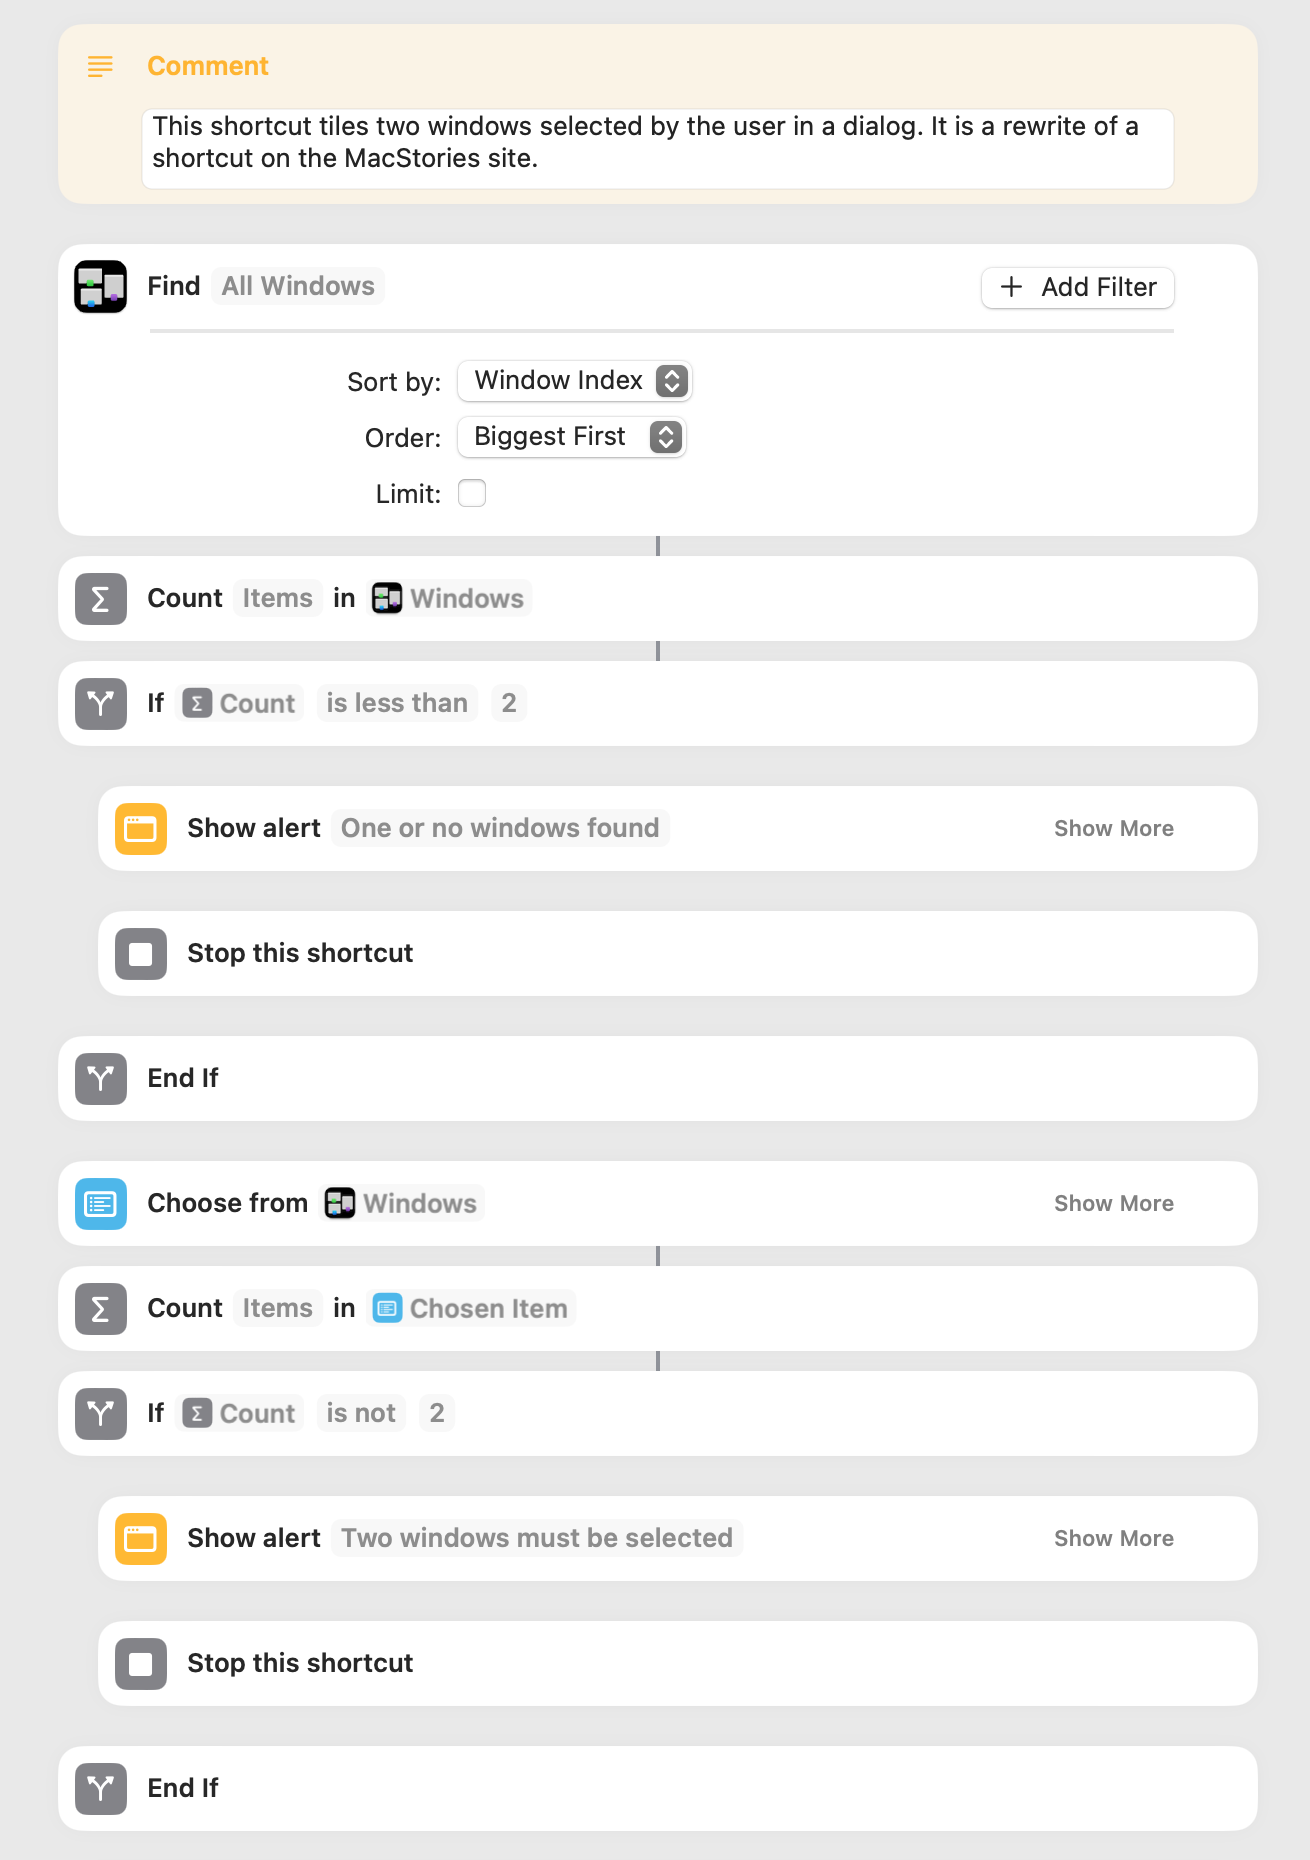
This shortcut prompts the user to select two windows in a dialog, after which these windows are tiled to the left and right sides of the screen. The following screenshot shows only the first portion of the shortcut.
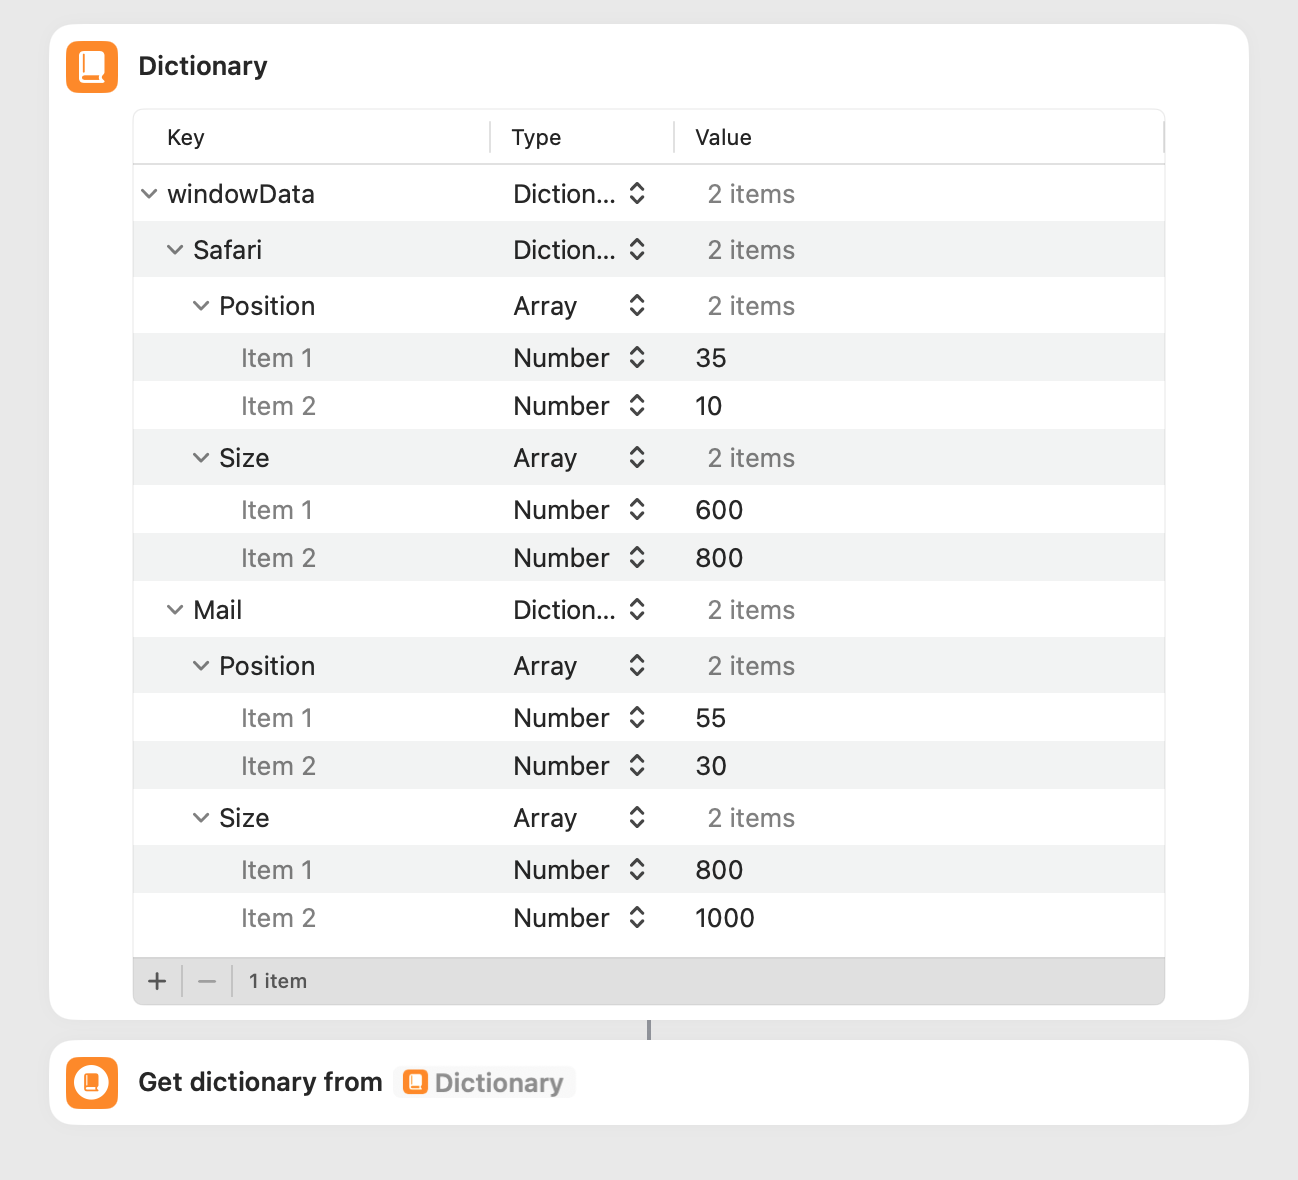
Getting values from a JSON object can be a bit involved for those of us with a limited knowledge of this topic, and I wrote an example for learning purposes. The following contains arrays within dictionaries within a dictionary:
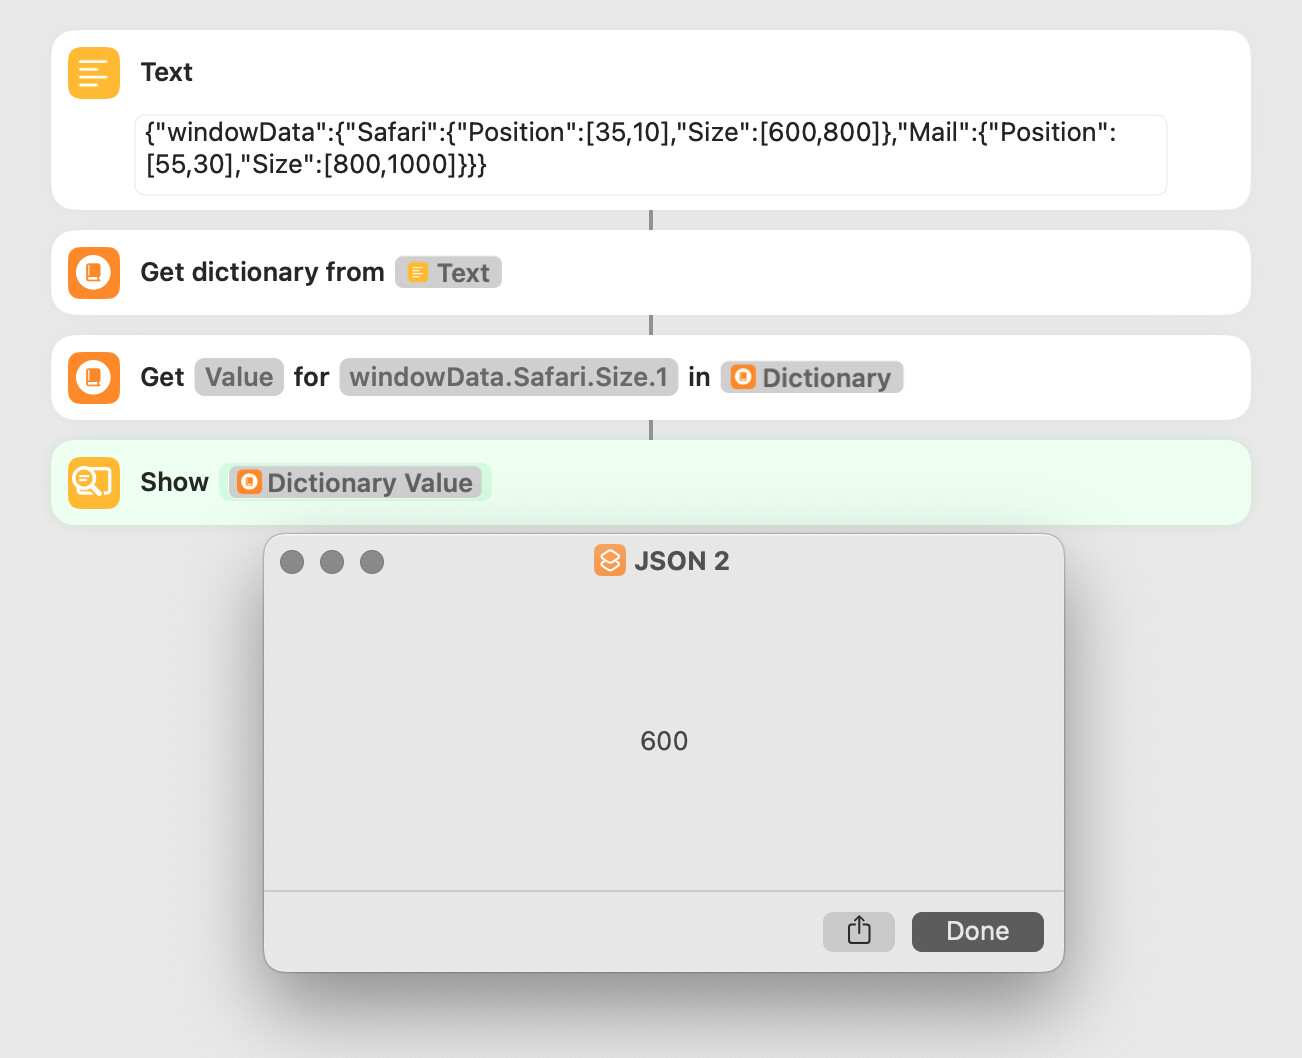
The following Text action contains the above dictionary formatted as a JSON object, and the shortcut gets the value of one item of an array using dot notation (the 1 at the end refers to item 1 of the array):
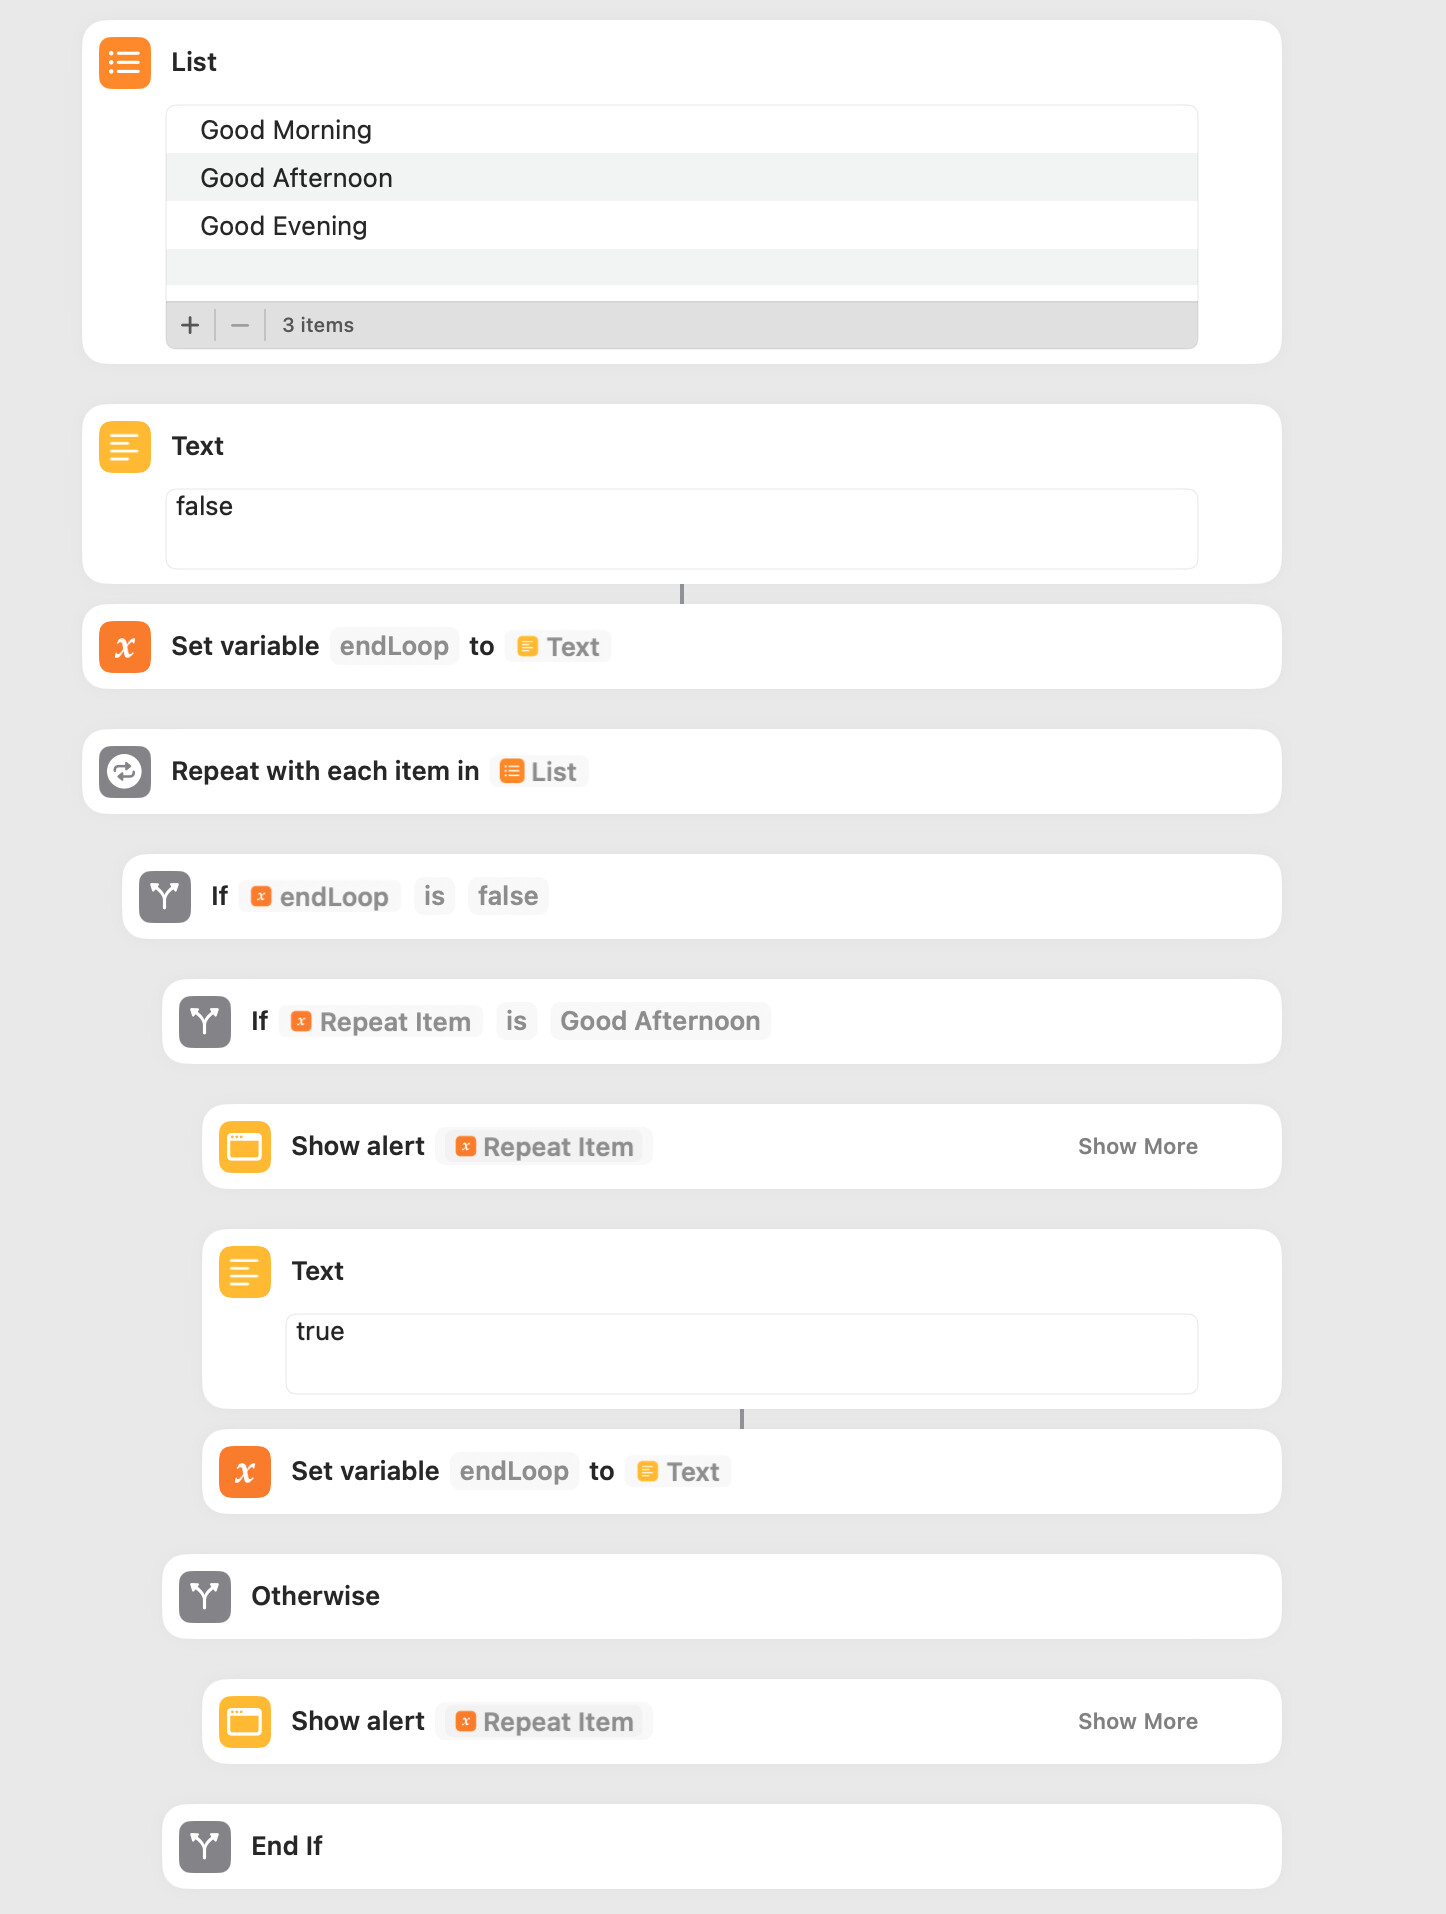
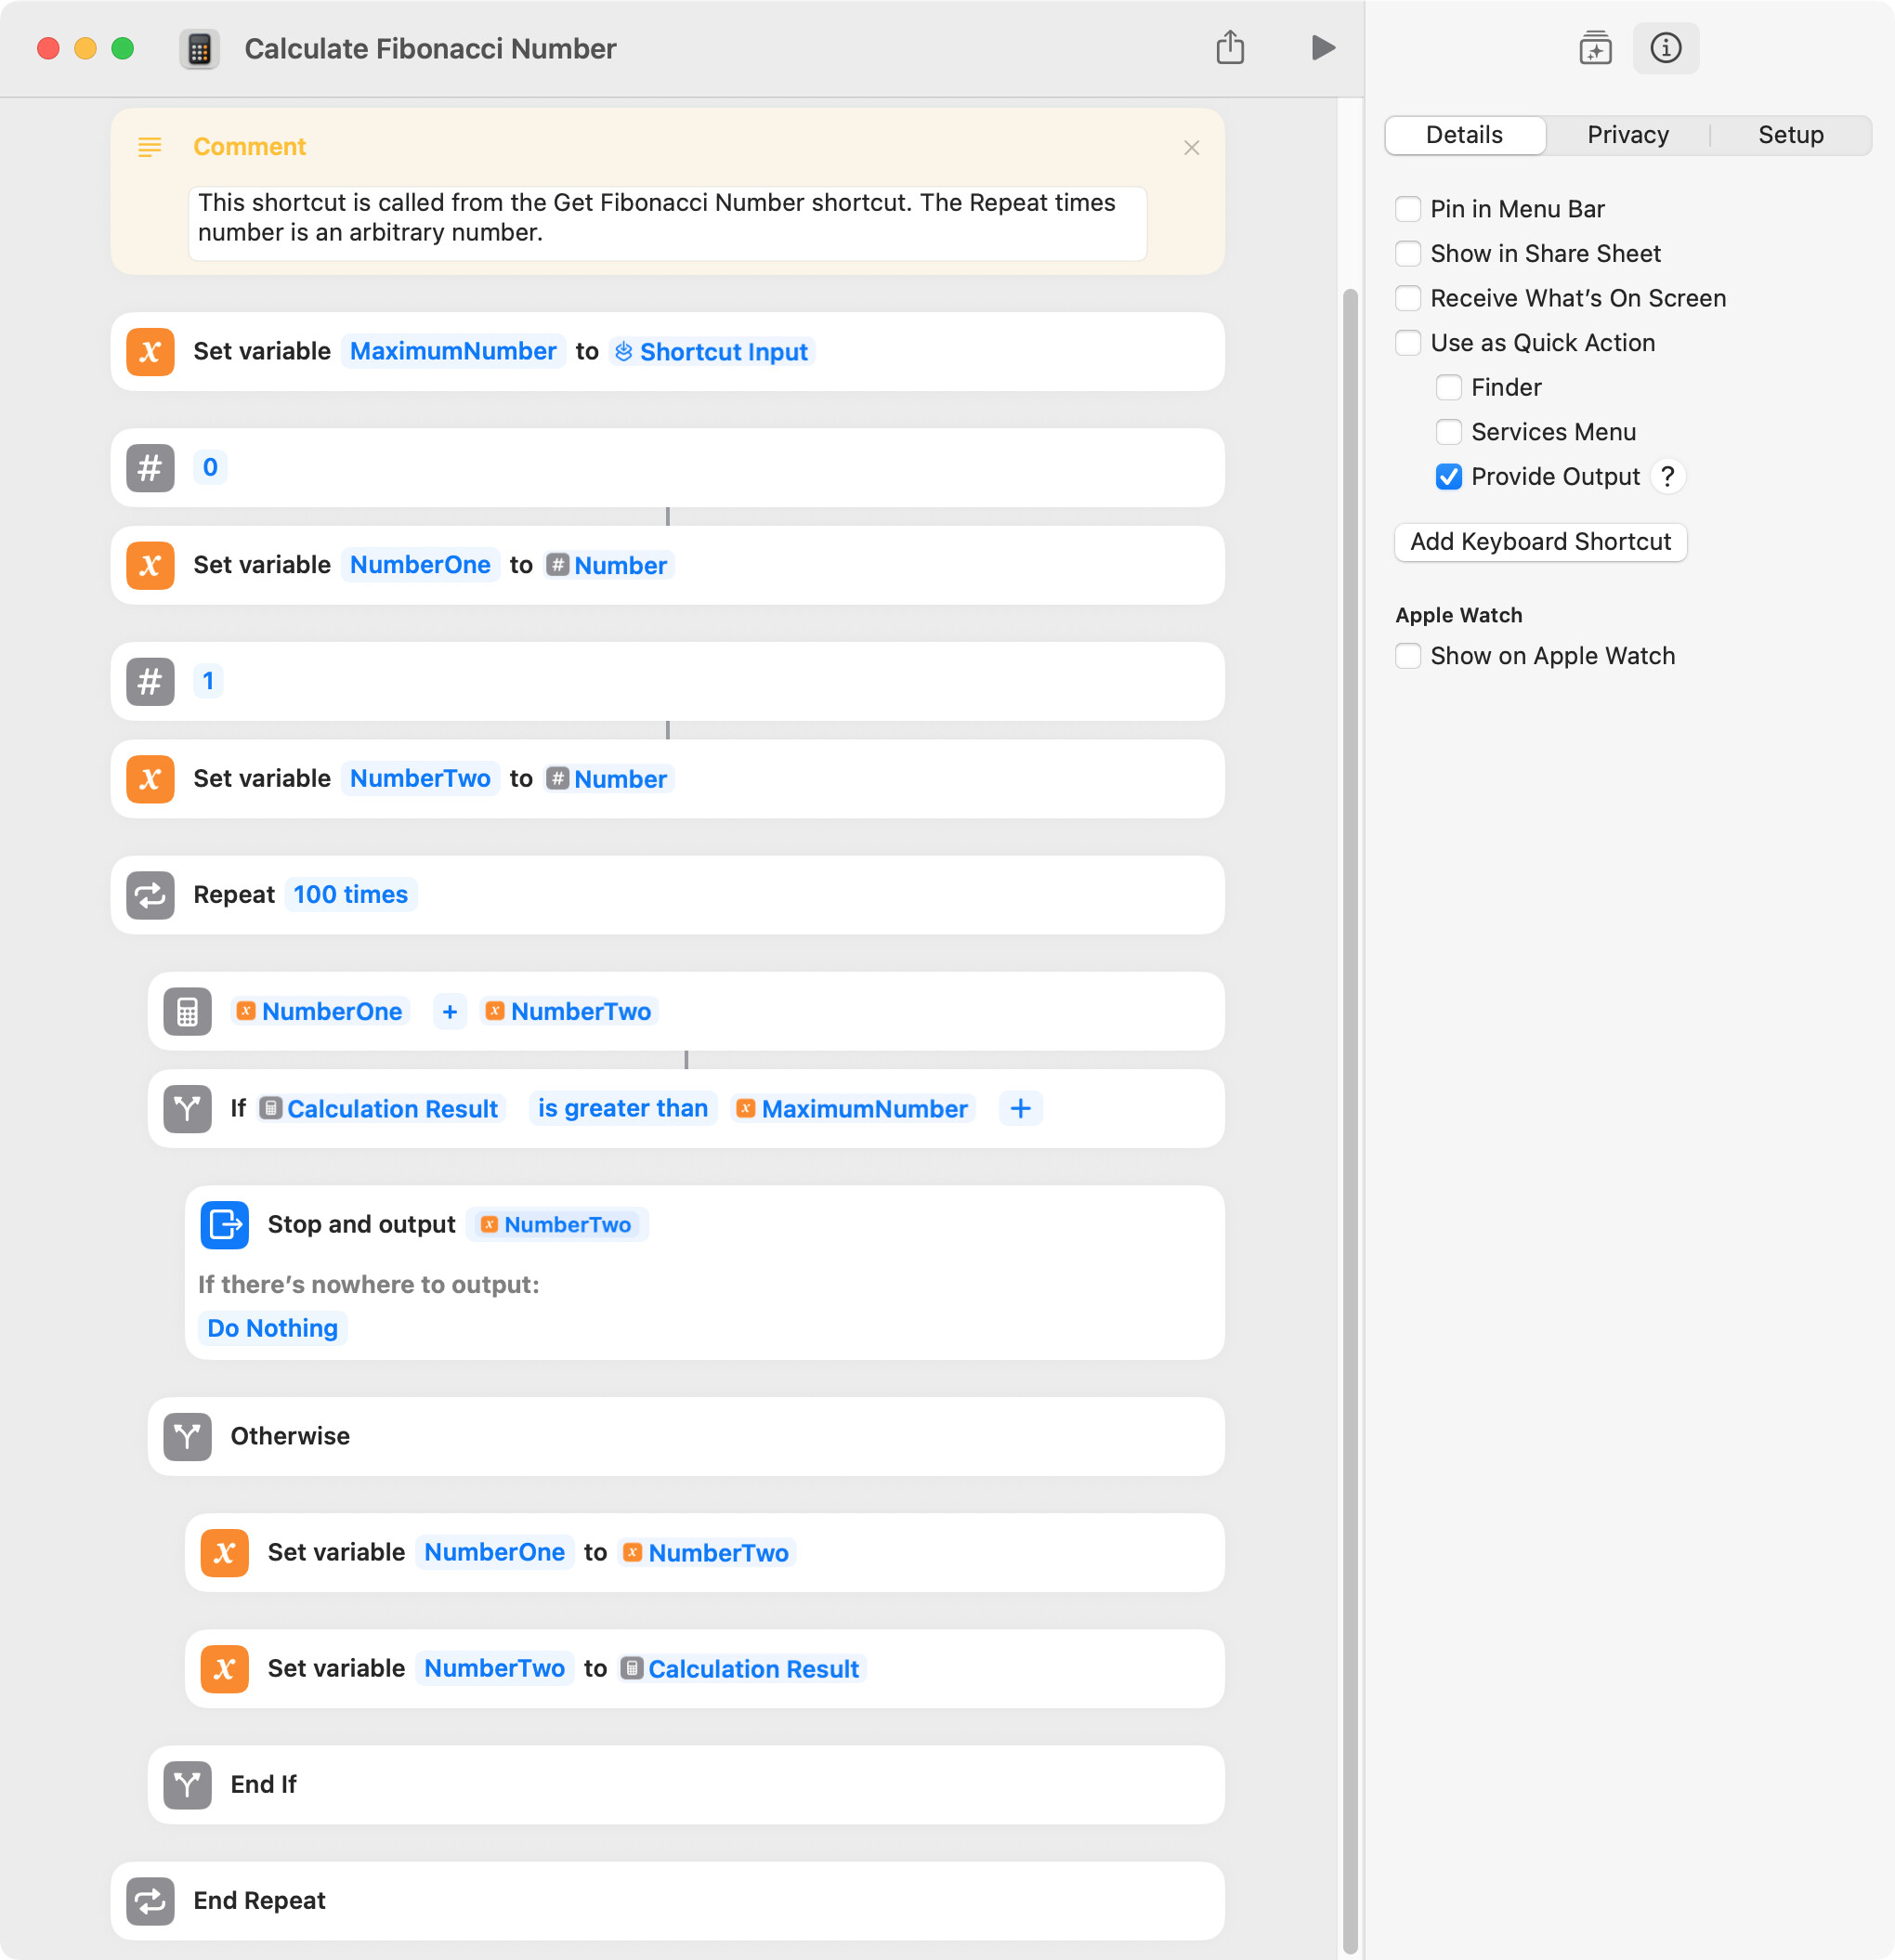
There does not appear to be a direct method to exit a repeat loop when a condition is met. One approach–which is used in several posts on Reddit–is that taken below, which does not actually exit the loop and instead does nothing. Another approach appears to be to place the repeat loop in a separate shortcut and to use the Stop Shortcut action to exit the repeat loop.
The following screenshot only shows a portion of the shortcut.
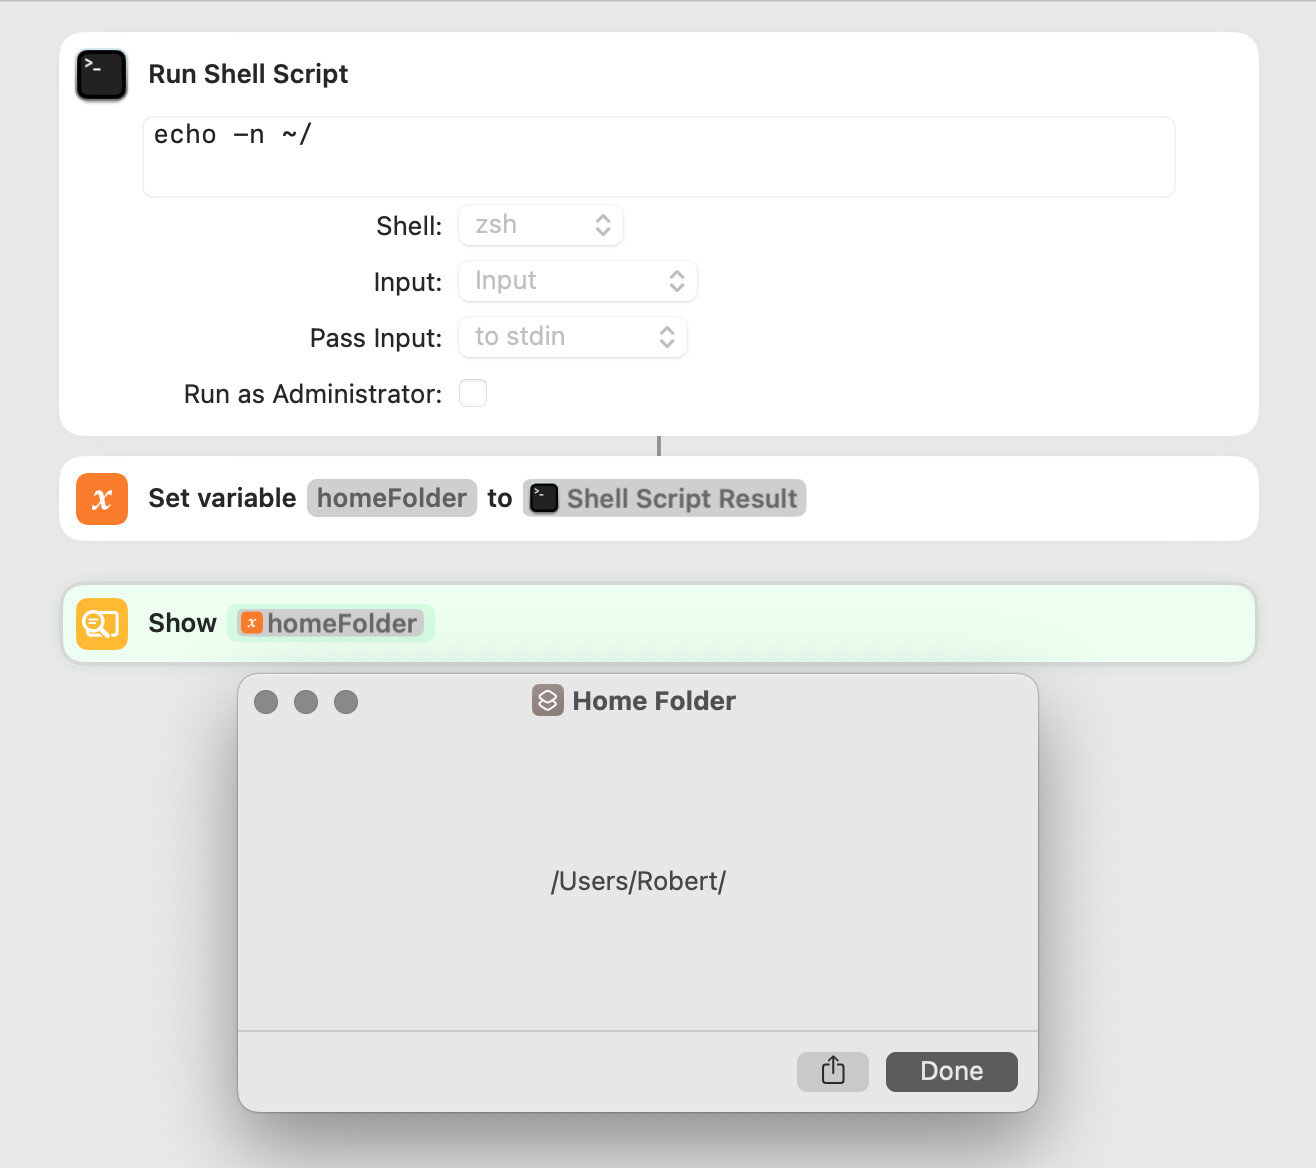
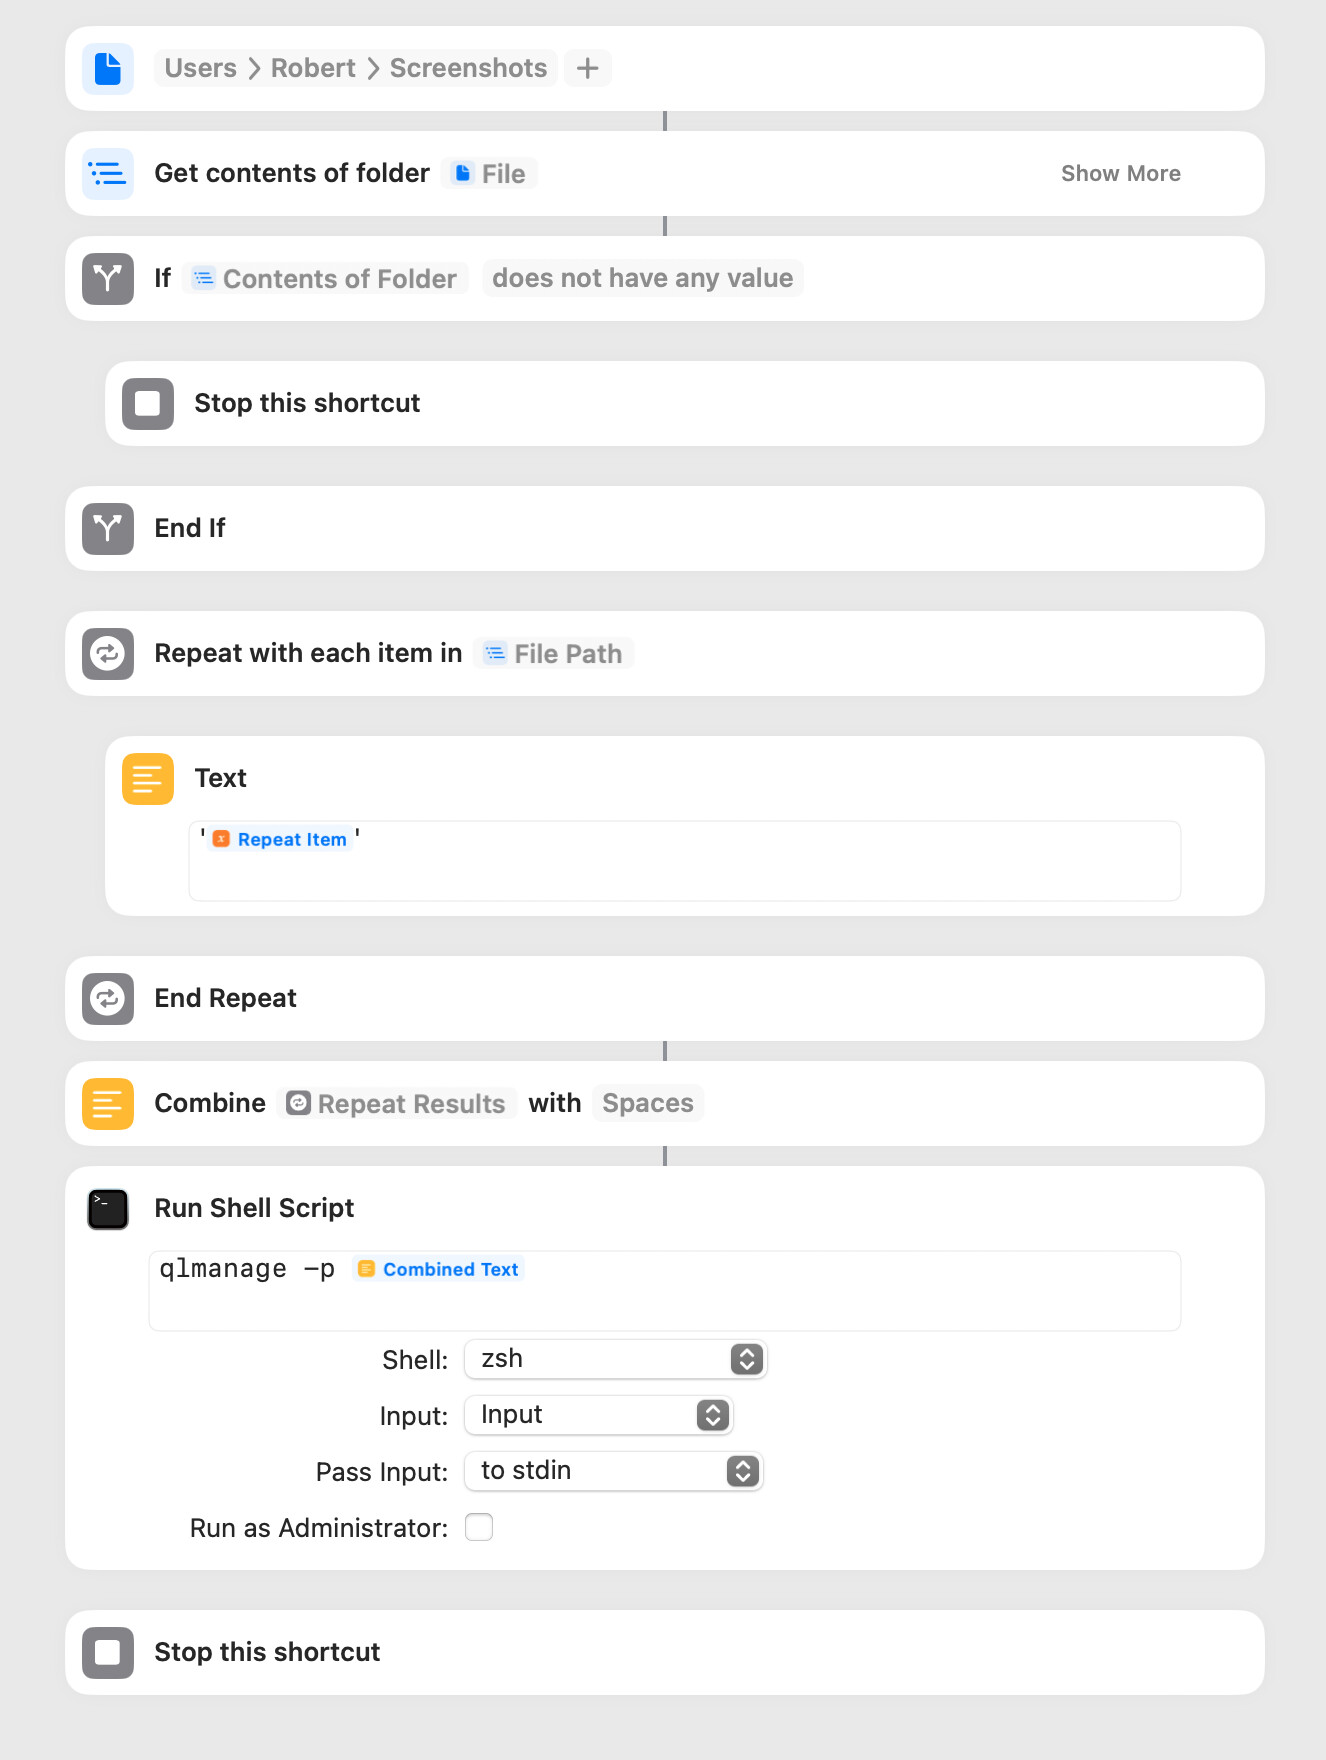
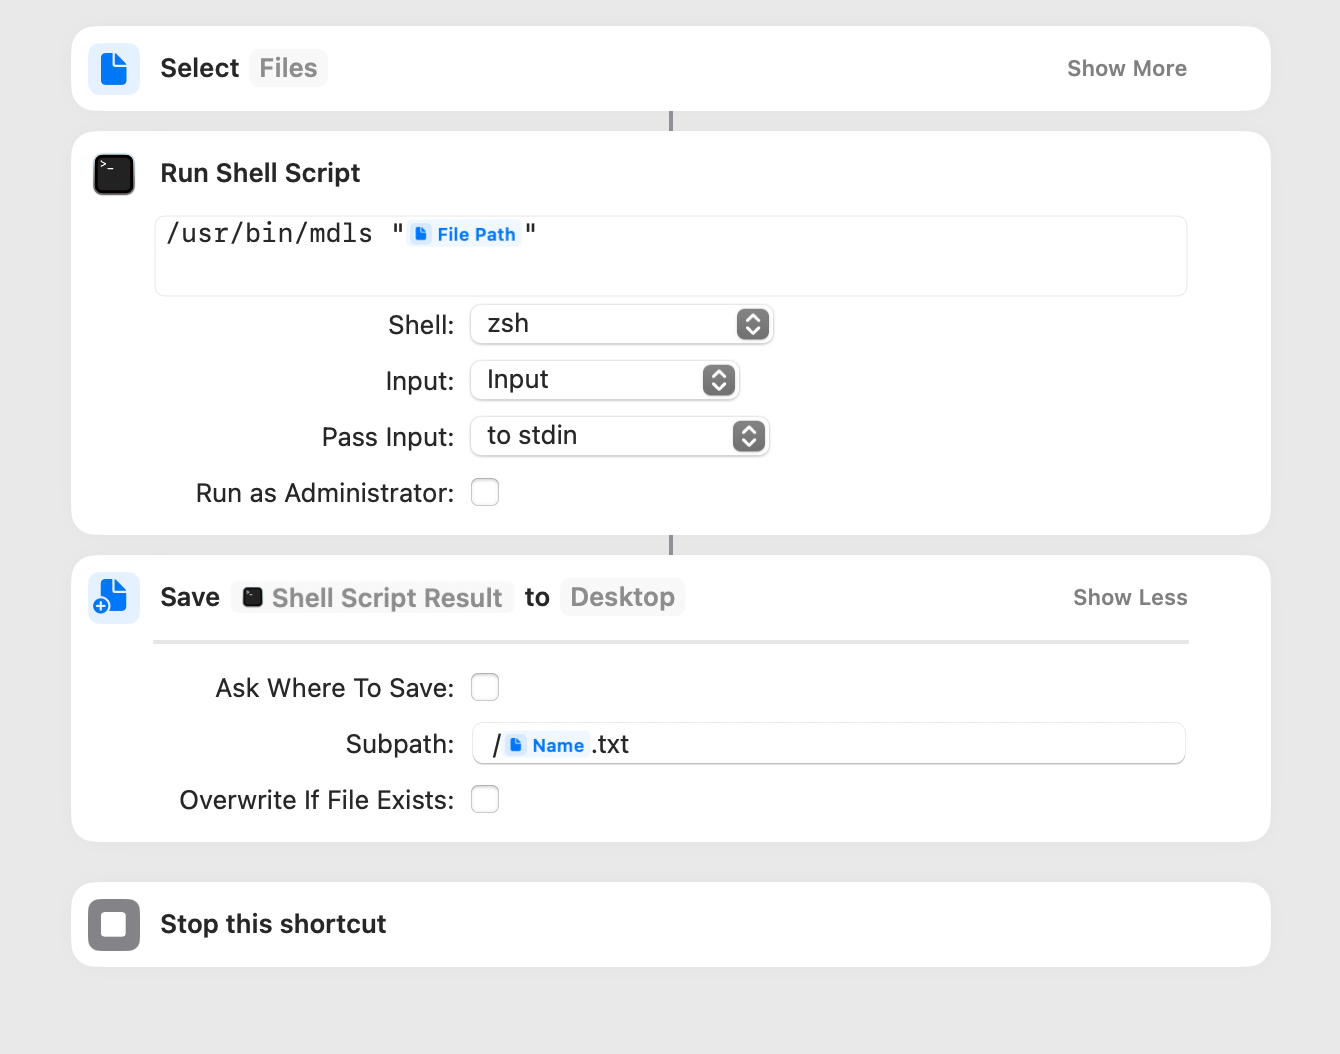
When running a shell script action, a string of quoted file paths is often required. The following demonstrates a simple method by which this can be done.
The mdls shell command returns information that is not otherwise available in a shortcut. The following gets the metadata attributes for a selected file and writes the data to a file on the desktop:
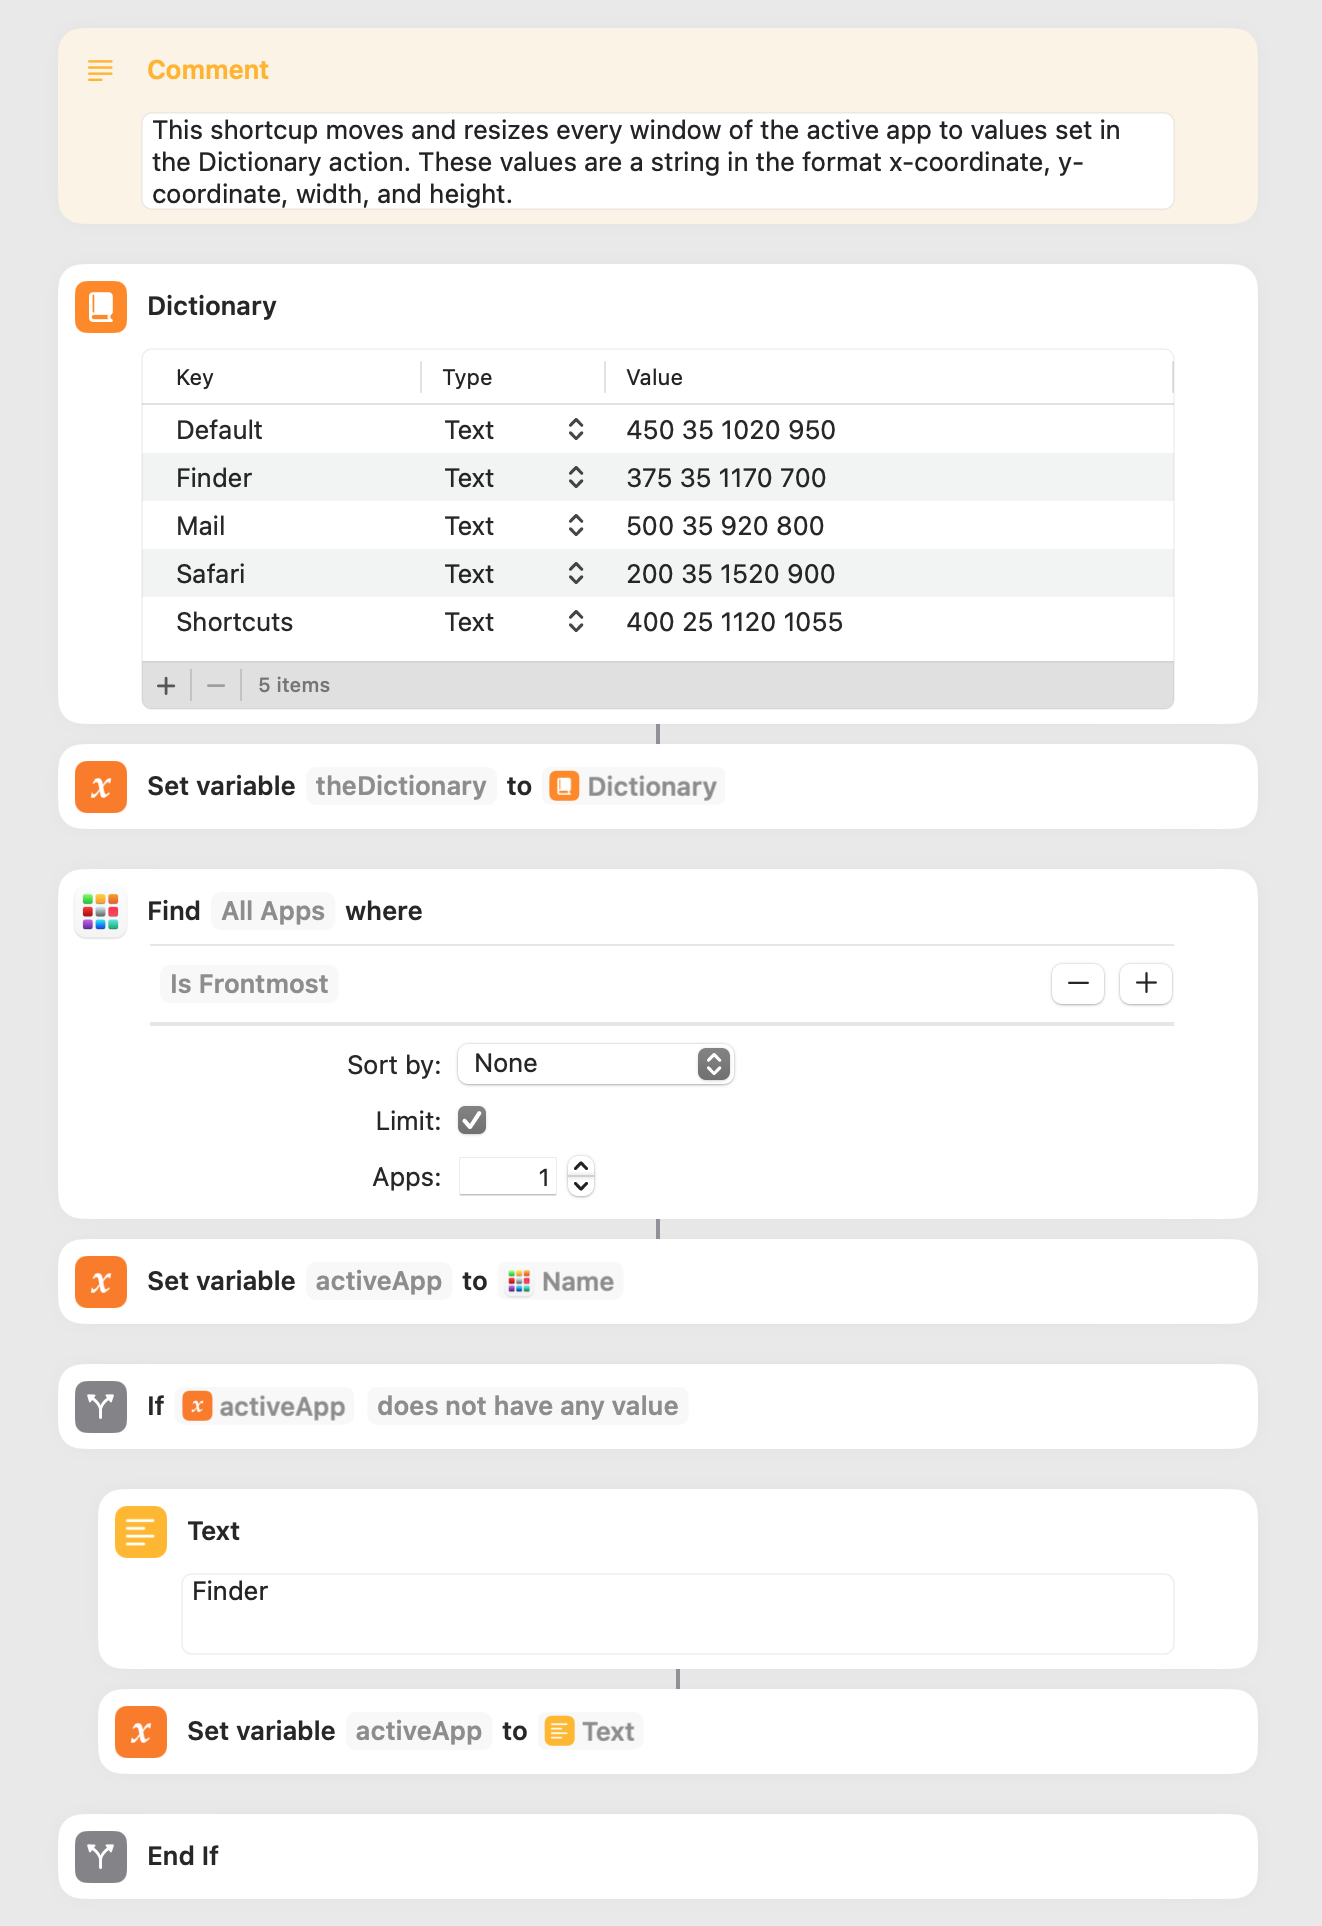
I wrote a test shortcut that exits a repeat loop by placing it in a separate shortcut and using a Stop Shortcut action to exit the repeat loop. This works reasonably well, although it’s a bit clumsy. Just by way of example, the following is the calling shortcut: