Forum member 1008com wrote an AppleScript that creates and manipulates disk images, and the thread discussing this AppleScript can be found here.
I didn’t know what use I would have for a disk image, and Google AI suggested the following:
The purpose of a disk image on a Mac is to act as a single file that contains the contents and structure of a disk, serving as a convenient way to back up, protect, and distribute files and software. Key uses include creating encrypted archives for sensitive data, packaging software installers, and providing a container for Time Machine backups.
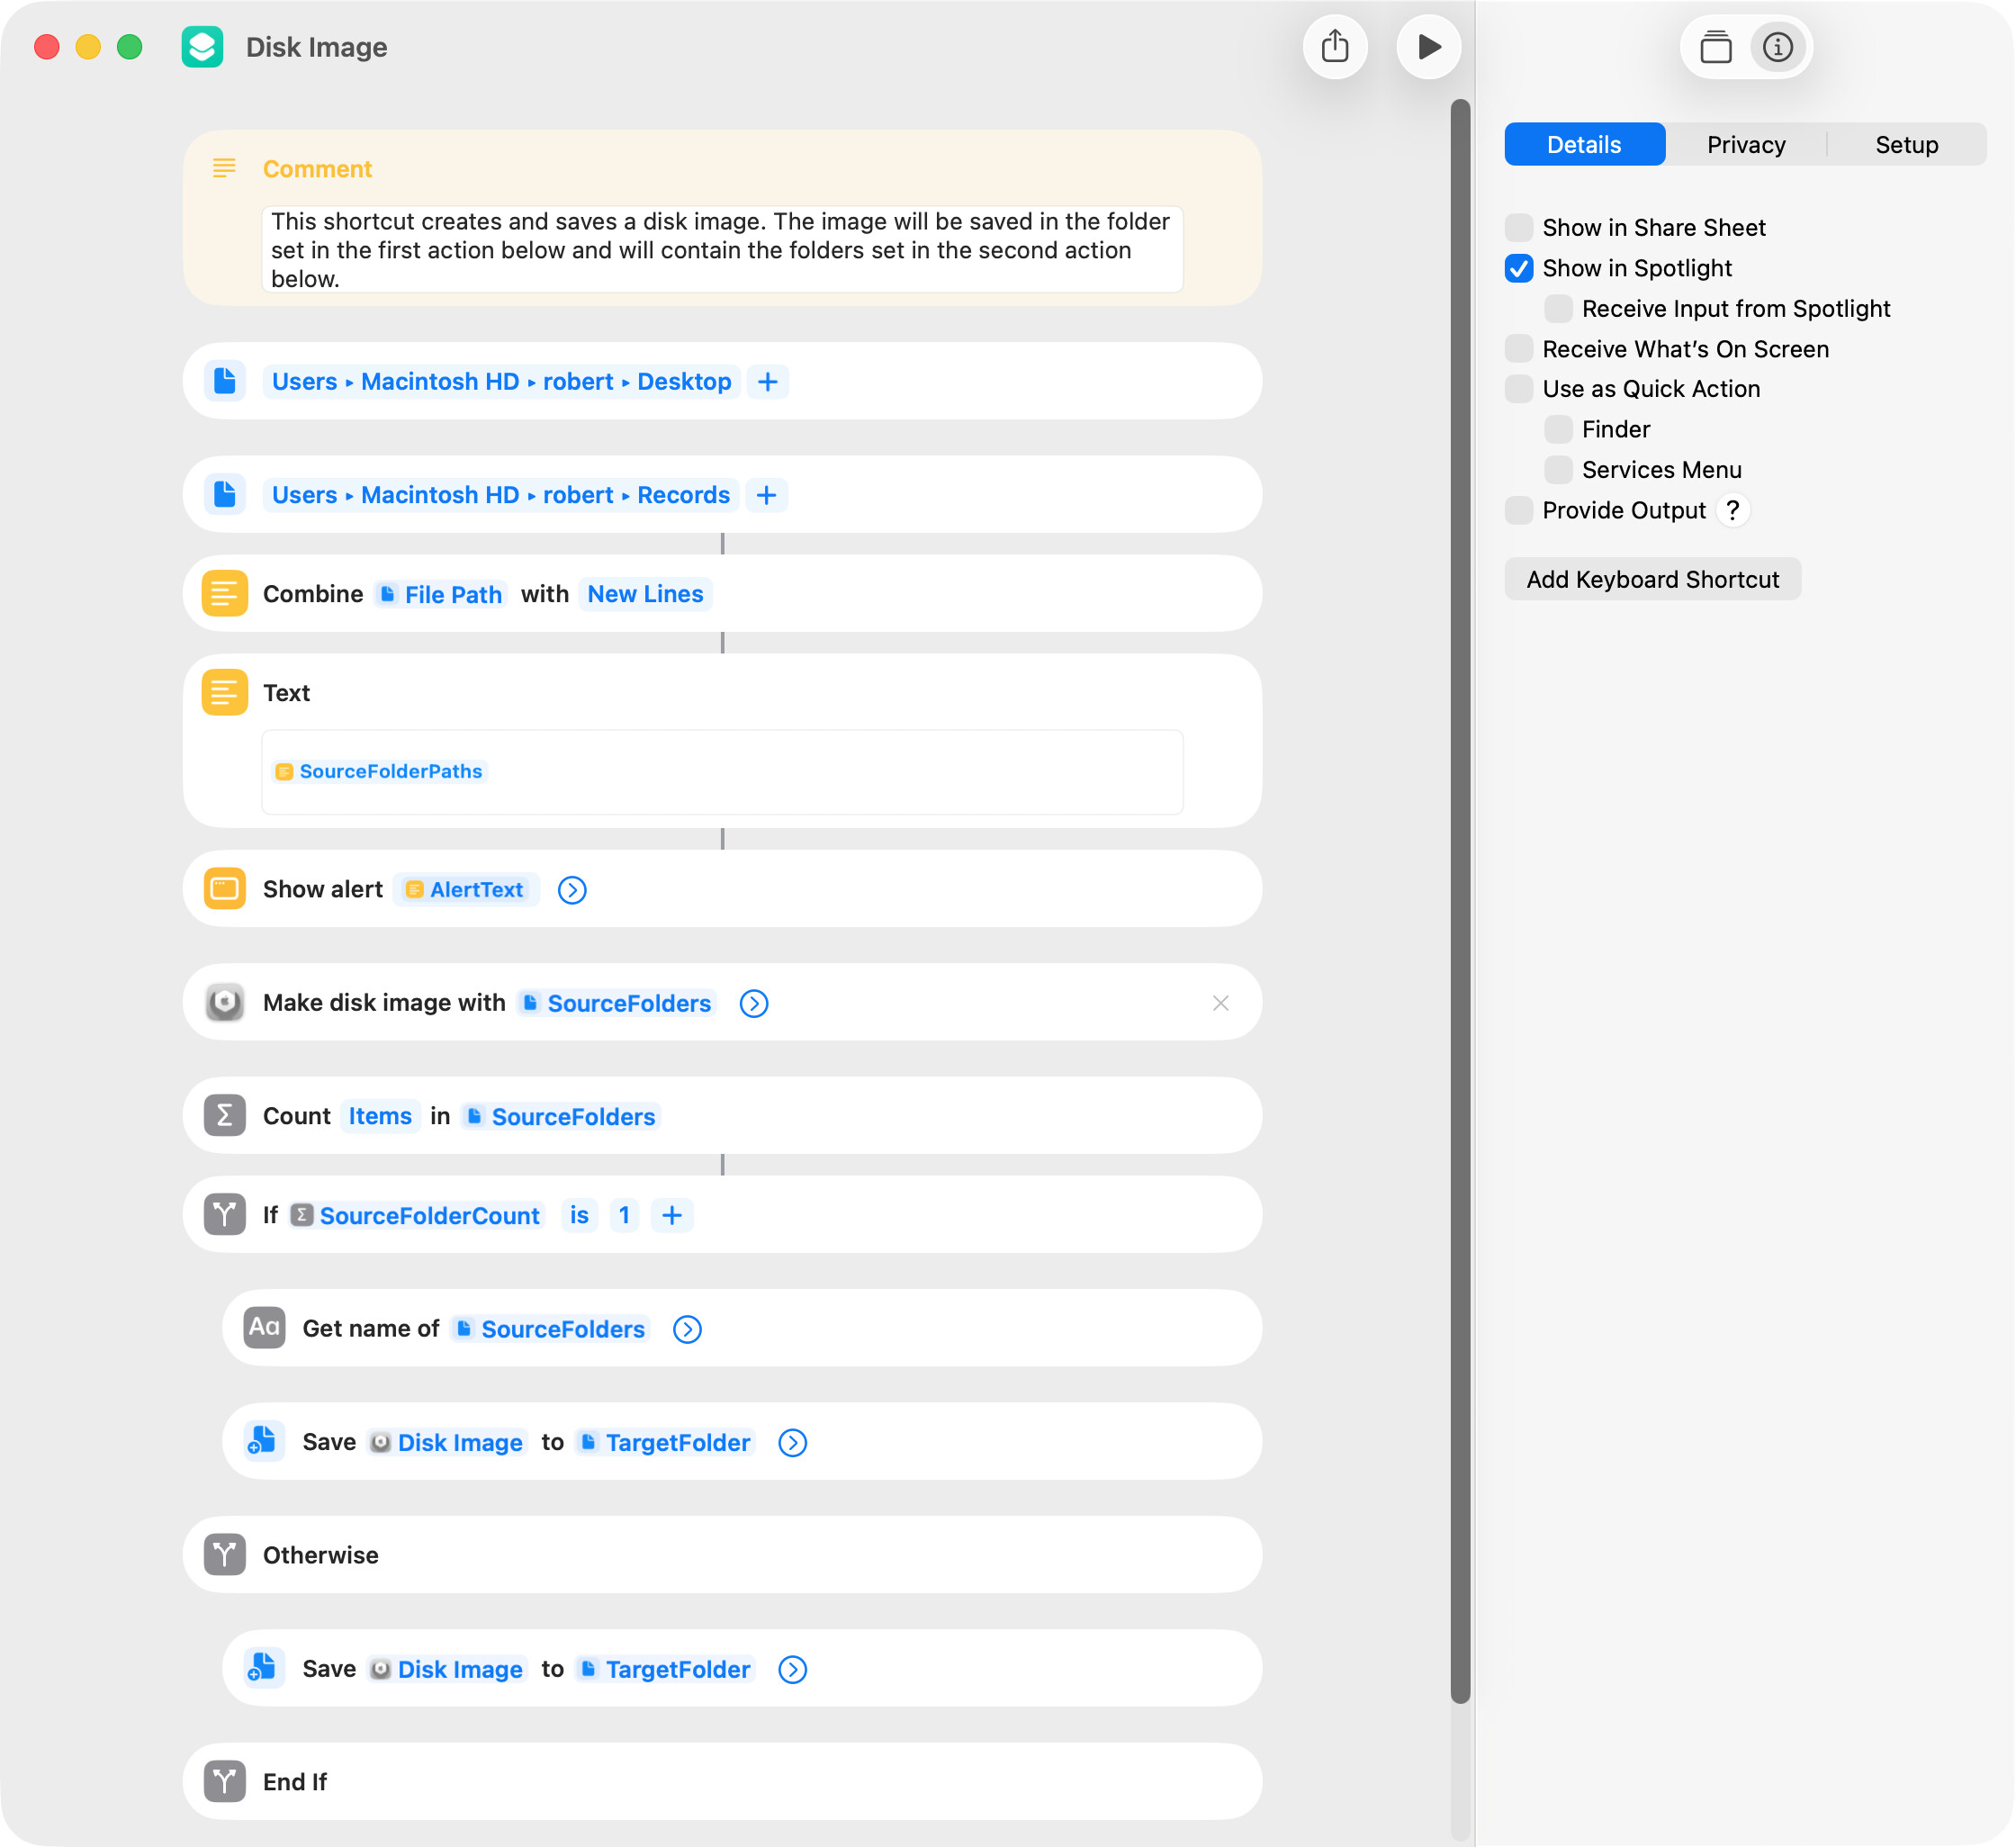
The Shortcuts app has a Make Disk Image action, and its operation is fairly straightforward. A few comments:
Multiple source folders can be added to the disk image.
The Size to Fit Contents option creates a sparse disk image, which only consumes as much disk space as is required for the data in the image.
The Image Size option sets the maximum allowed image size. The 1 GB value used is arbitrary.
Creating a disk image containing two moderately-sized folders on my M2 Mac mini took 11 seconds.
I was unable to create a disk image of my smallish home folder.
Other disk-image-related actions are Mount Disk Image and Eject Disk.
That’s great!
I imagine many people prefer using shortcuts for this kind of task — nicely done.
In the past, there were many situations where we often used font suitcases.
As for me, I like putting custom icons on files and folders…
and using Finder Comment
so DMGs still get used fairly often on my end.
ZIP is fine as long as the recipient extracts it normally,
but some people use extracts like 7z…
When someone receives a DMG, some will launch the app directly from the mounted volume,
but
When receiving DMG data from someone else
will manually copy it to their Desktop or wherever they prefer.
Copying files across volumes is now more often quarantined into /.nofollow,
which I think is a good thing
Up to the point where the file is copied, it can be safe.
I’m looking forward to more useful shortcut posts from you!
When creating a DMG from a folder, adding a small note inside like “This data was provided to [name]” makes people handle the files surprisingly carefully… haha.
IceFole. Thanks for looking at my shortcut and for the kind words.
FWIW, the following is a workaround of sorts that allowed me to create a disk image of visible folders and files in my home folder. The size of the disk image was 258 MB, and the timing result on my M2 Mac mini was 40 seconds.
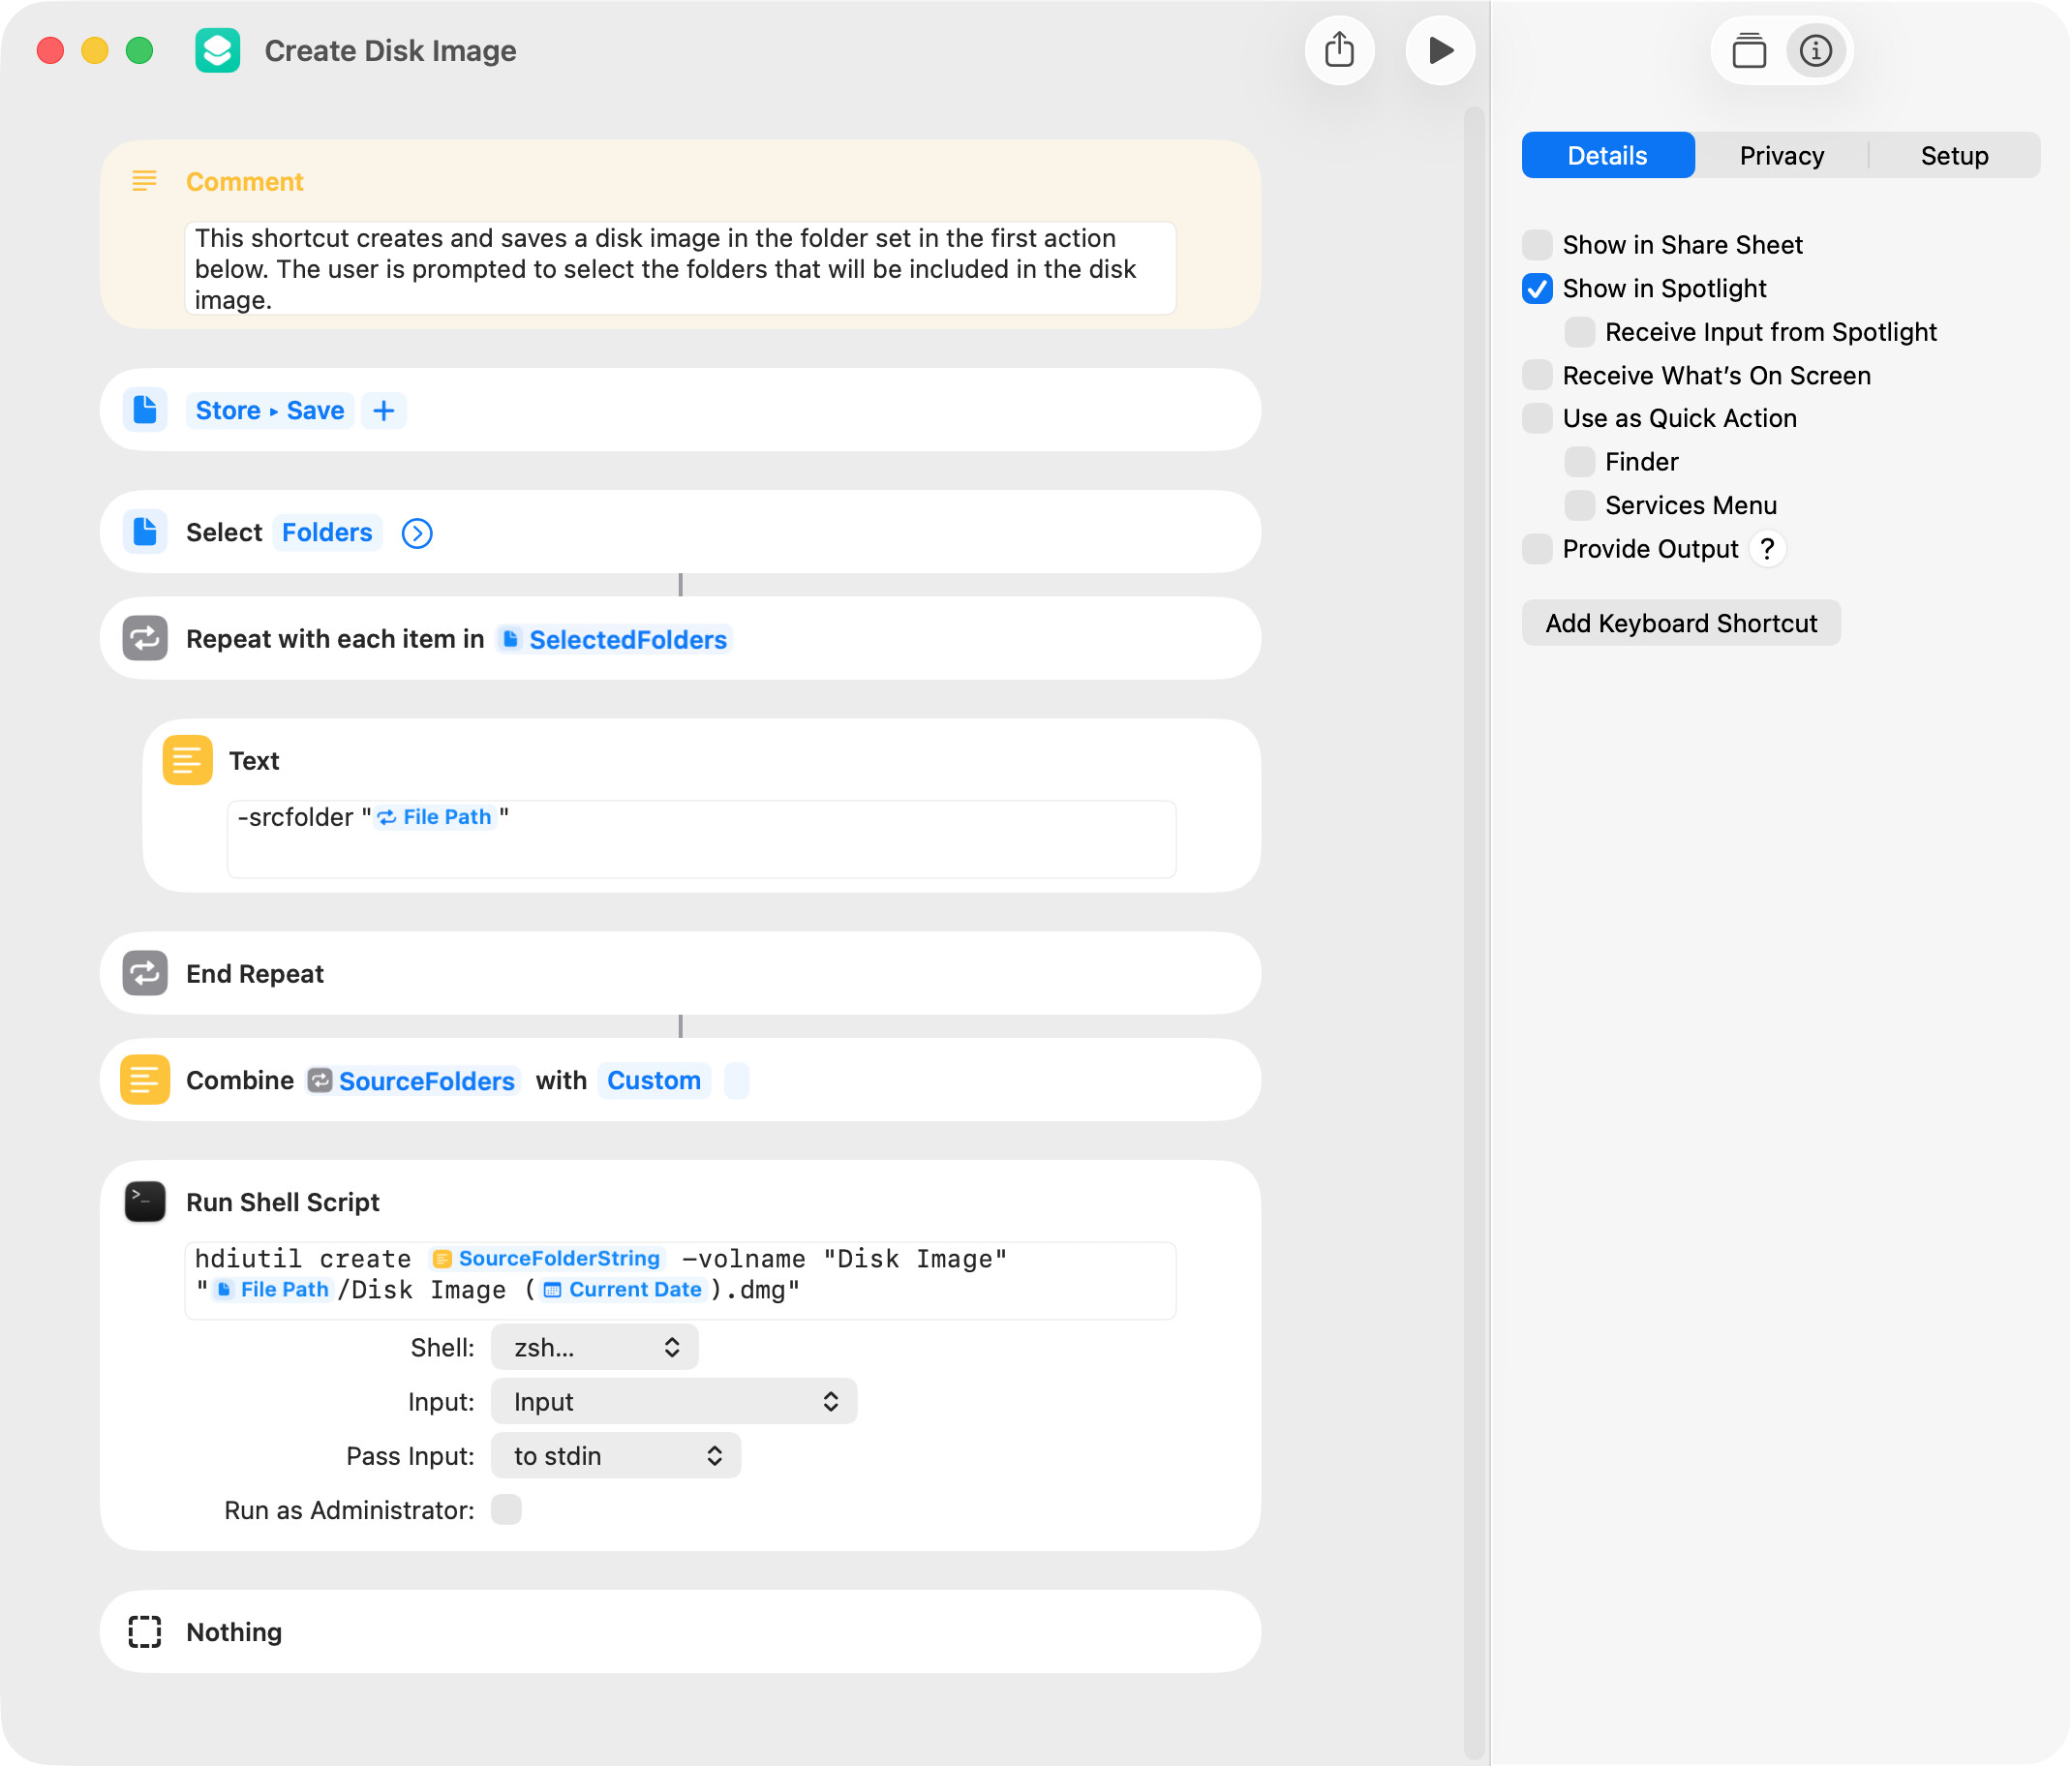
If the shortcuts included earlier in this thread do not contain a desired disk-image option, the hdiutil shell command can be run in a Run Shell Script action. The following is a simple example.
I tested both the shortcut included immediately above and the first shortcut in this thread on a folder that contained 257 MB. The image created with the shortcut included immediately above was about 2 percent larger and took about 10 percent longer to create (all timing results were in the approximate range of 10 to 12 seconds).
I used a dialog in this shortcut to select the source folders just to demonstrate this as an approach.
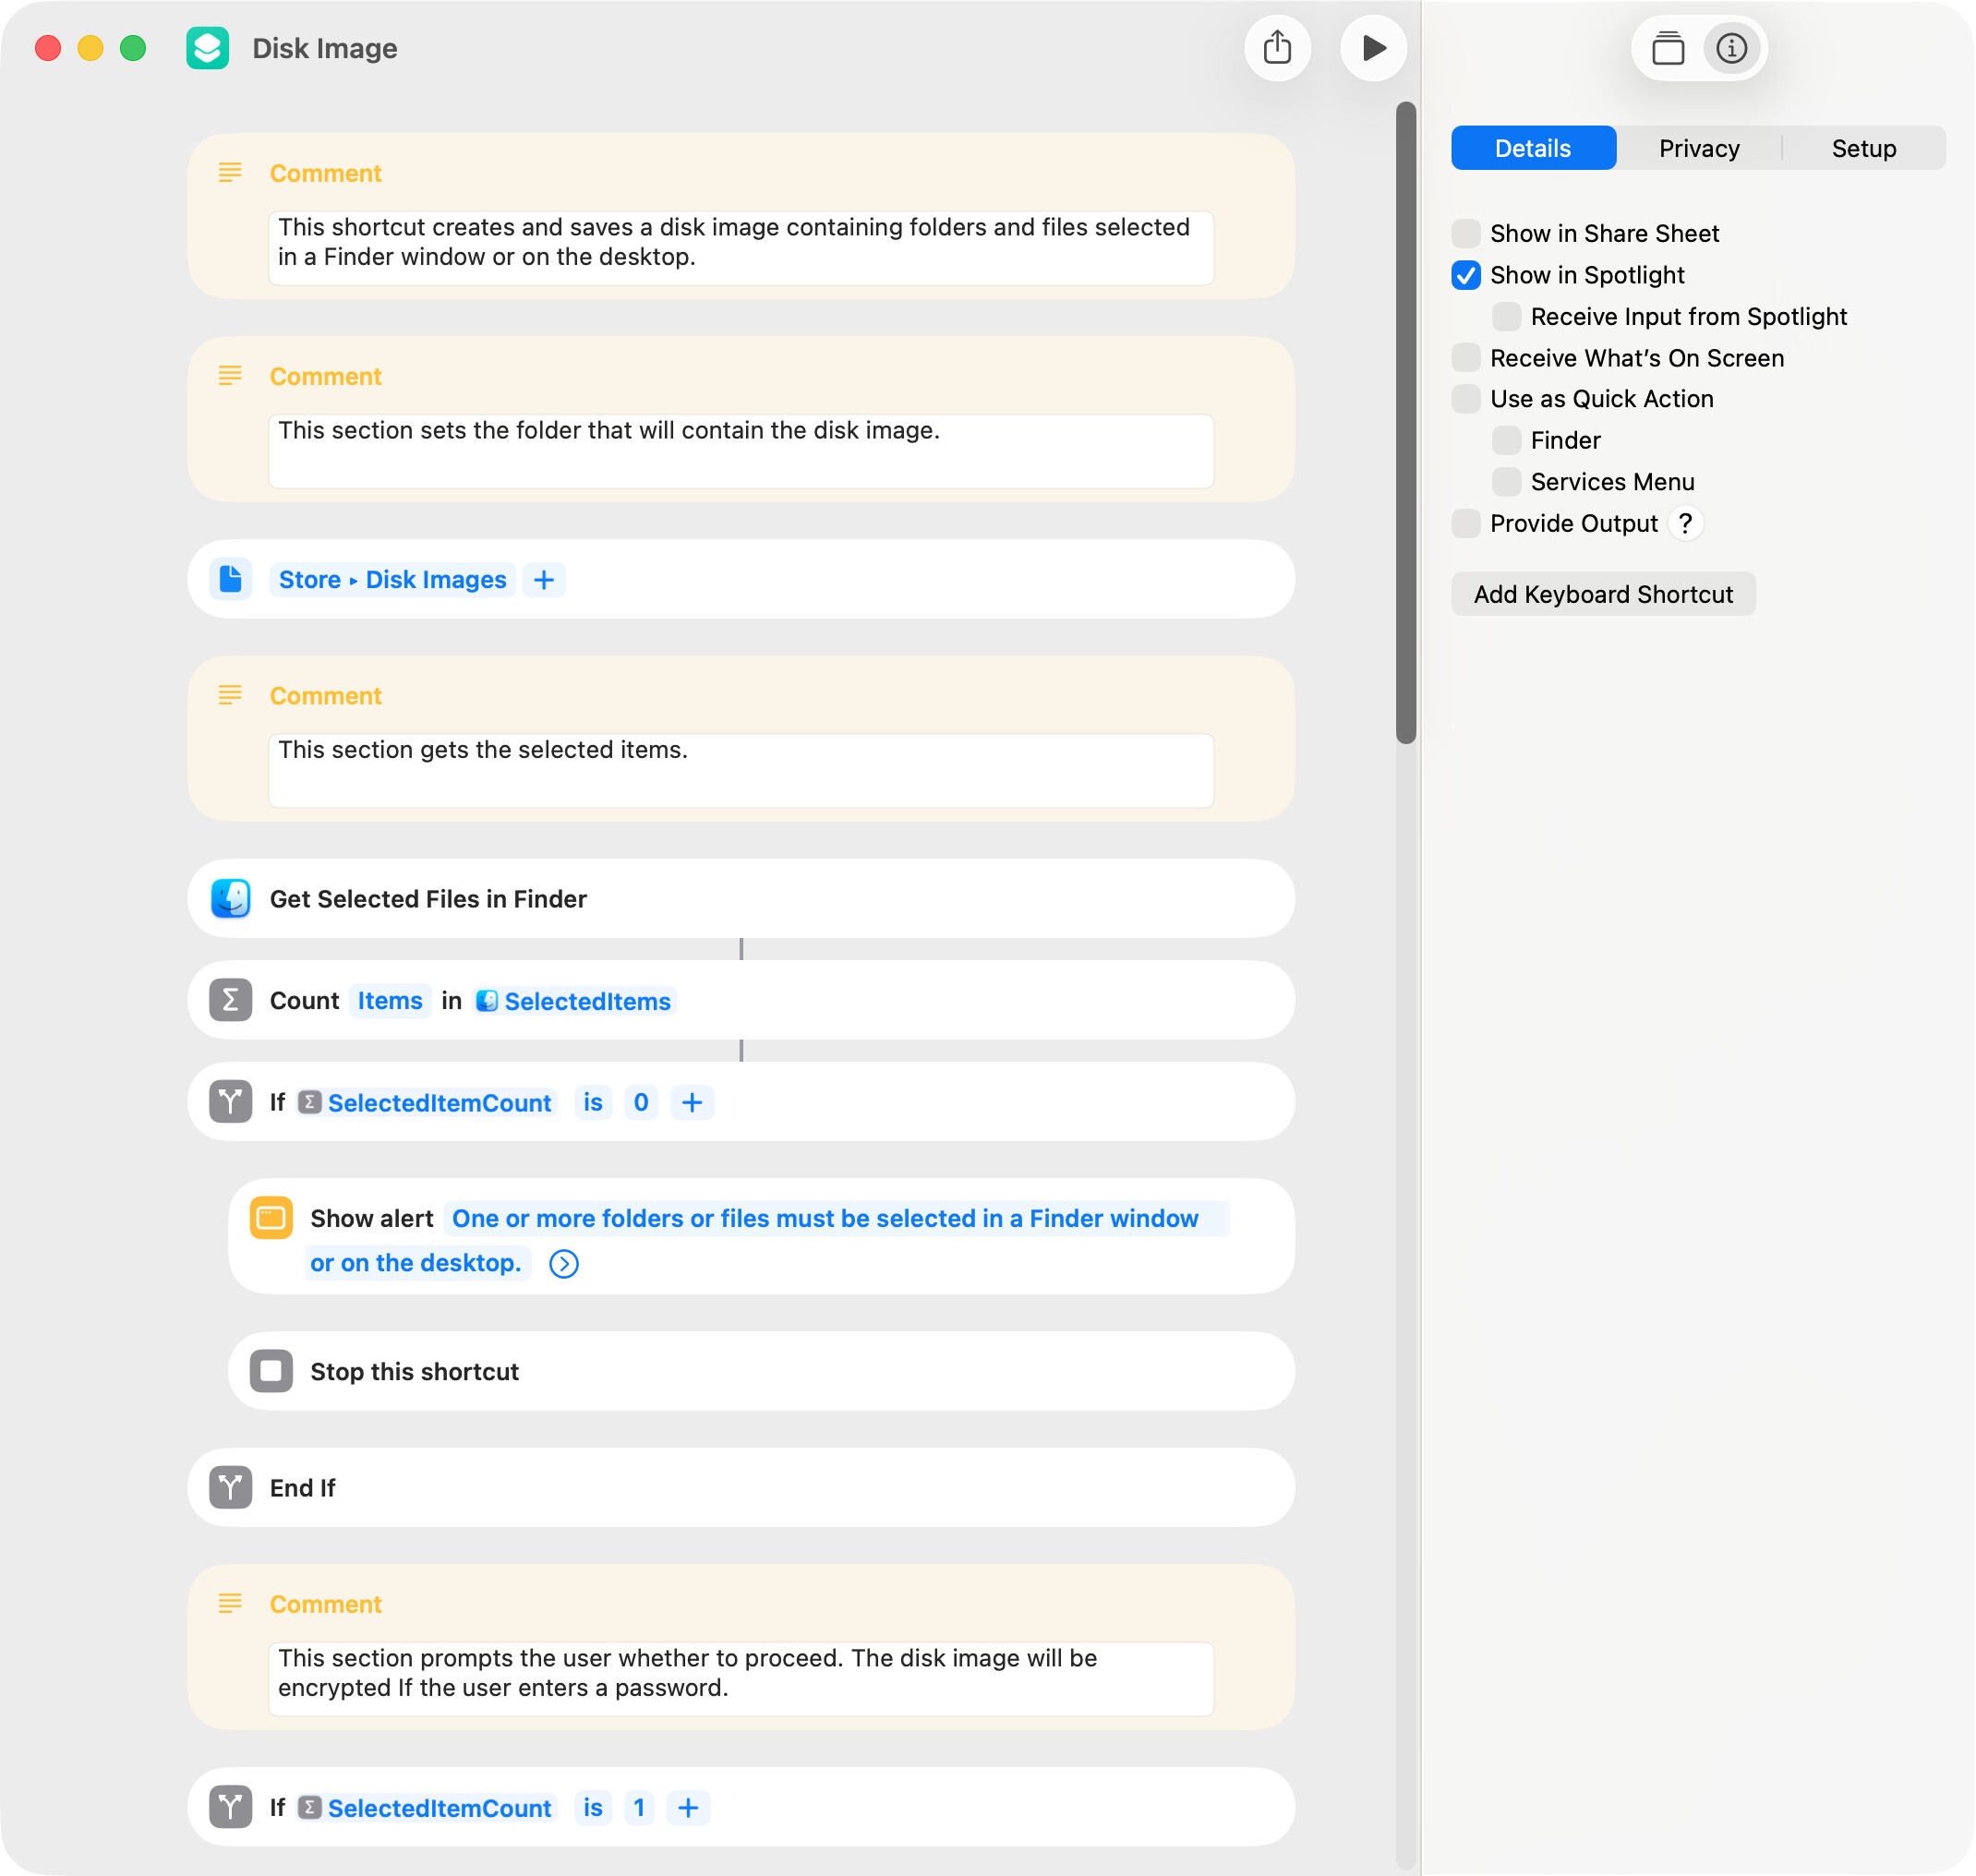
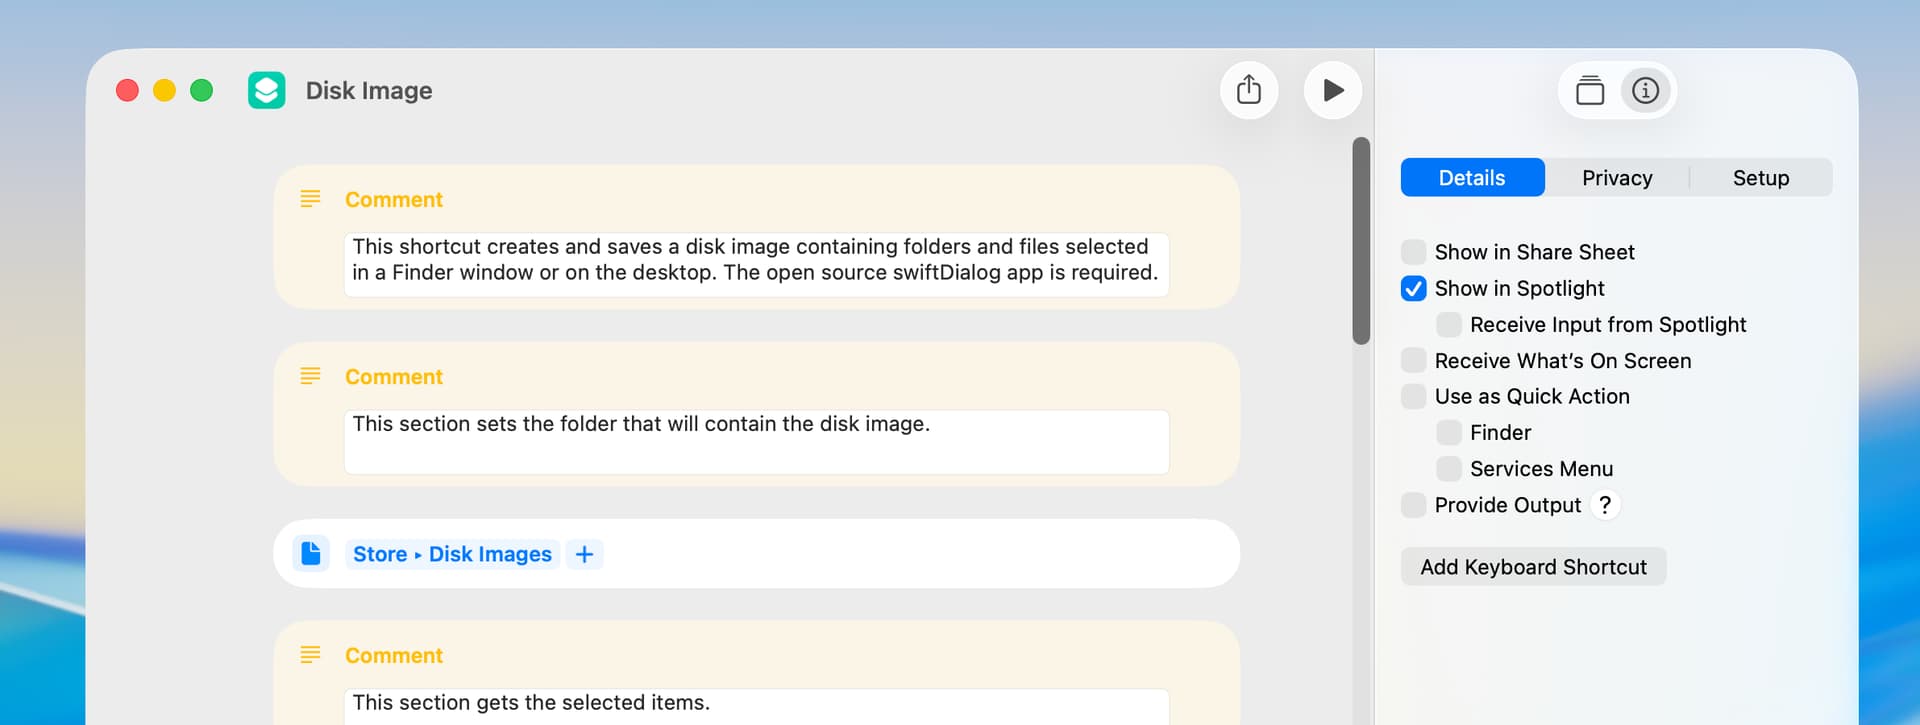
I wrote a disk-image shortcut for my own use and thought I’d include a copy here FWIW. A few comments:
The disk image contains folders and files selected in a Finder window or on the desktop.
The disk image will be encrypted if the user enters a password when prompted.
I used the hdiutil command to create the disk image, because I wanted to avoid the enter-password dialog displayed by the Make Disk Image action.
An image has a minimum file size of about 140 KB regardless of its contents. I don’t know any way around this.
If a disk image is made with two or more folders selected in a Finder window, these folders are shown when the disk image is opened. In contrast, if a single folder is selected in a Finder window, the contents of that folder are shown when the disk image is opened. This seems a bit inconsistent, but that’s just how it works (as far as I’m aware).
The following screenshot only shows a portion of the shortcut.
The hdiutil shell command has many options, but the -format option seems pertinent in my use of this utility. So, I tested the zlib-compressed image format (UDZO), which is the default, and the read-only image format (UDRO), which is recommended for its speed. My test folder contained 258.3 MB with 522 files in 129 folders, and most of these files were PDF documents.
The testing results with unencrypted images were:
FORMAT - FILE SIZE - TIME TO CREATE
UDRO - 259.0 MB - 7.2 seconds
UDZO - 225.4 MB - 11.2 seconds
With an encrypted image, the file sizes were essentially the same, and the timing results were 12.2 and 16.2 seconds, respectively.
To enable the UDRO format, simply add -format UDRO to the command line after the -srcfolder option.
BTW, just as a further test, I created compressed and uncompressed disk images of a folder containing seven AppleScripts, and the disk-image file sizes were 43 and 446 KB, respectively. So, file type should probably be considered when deciding whether or not to compress.
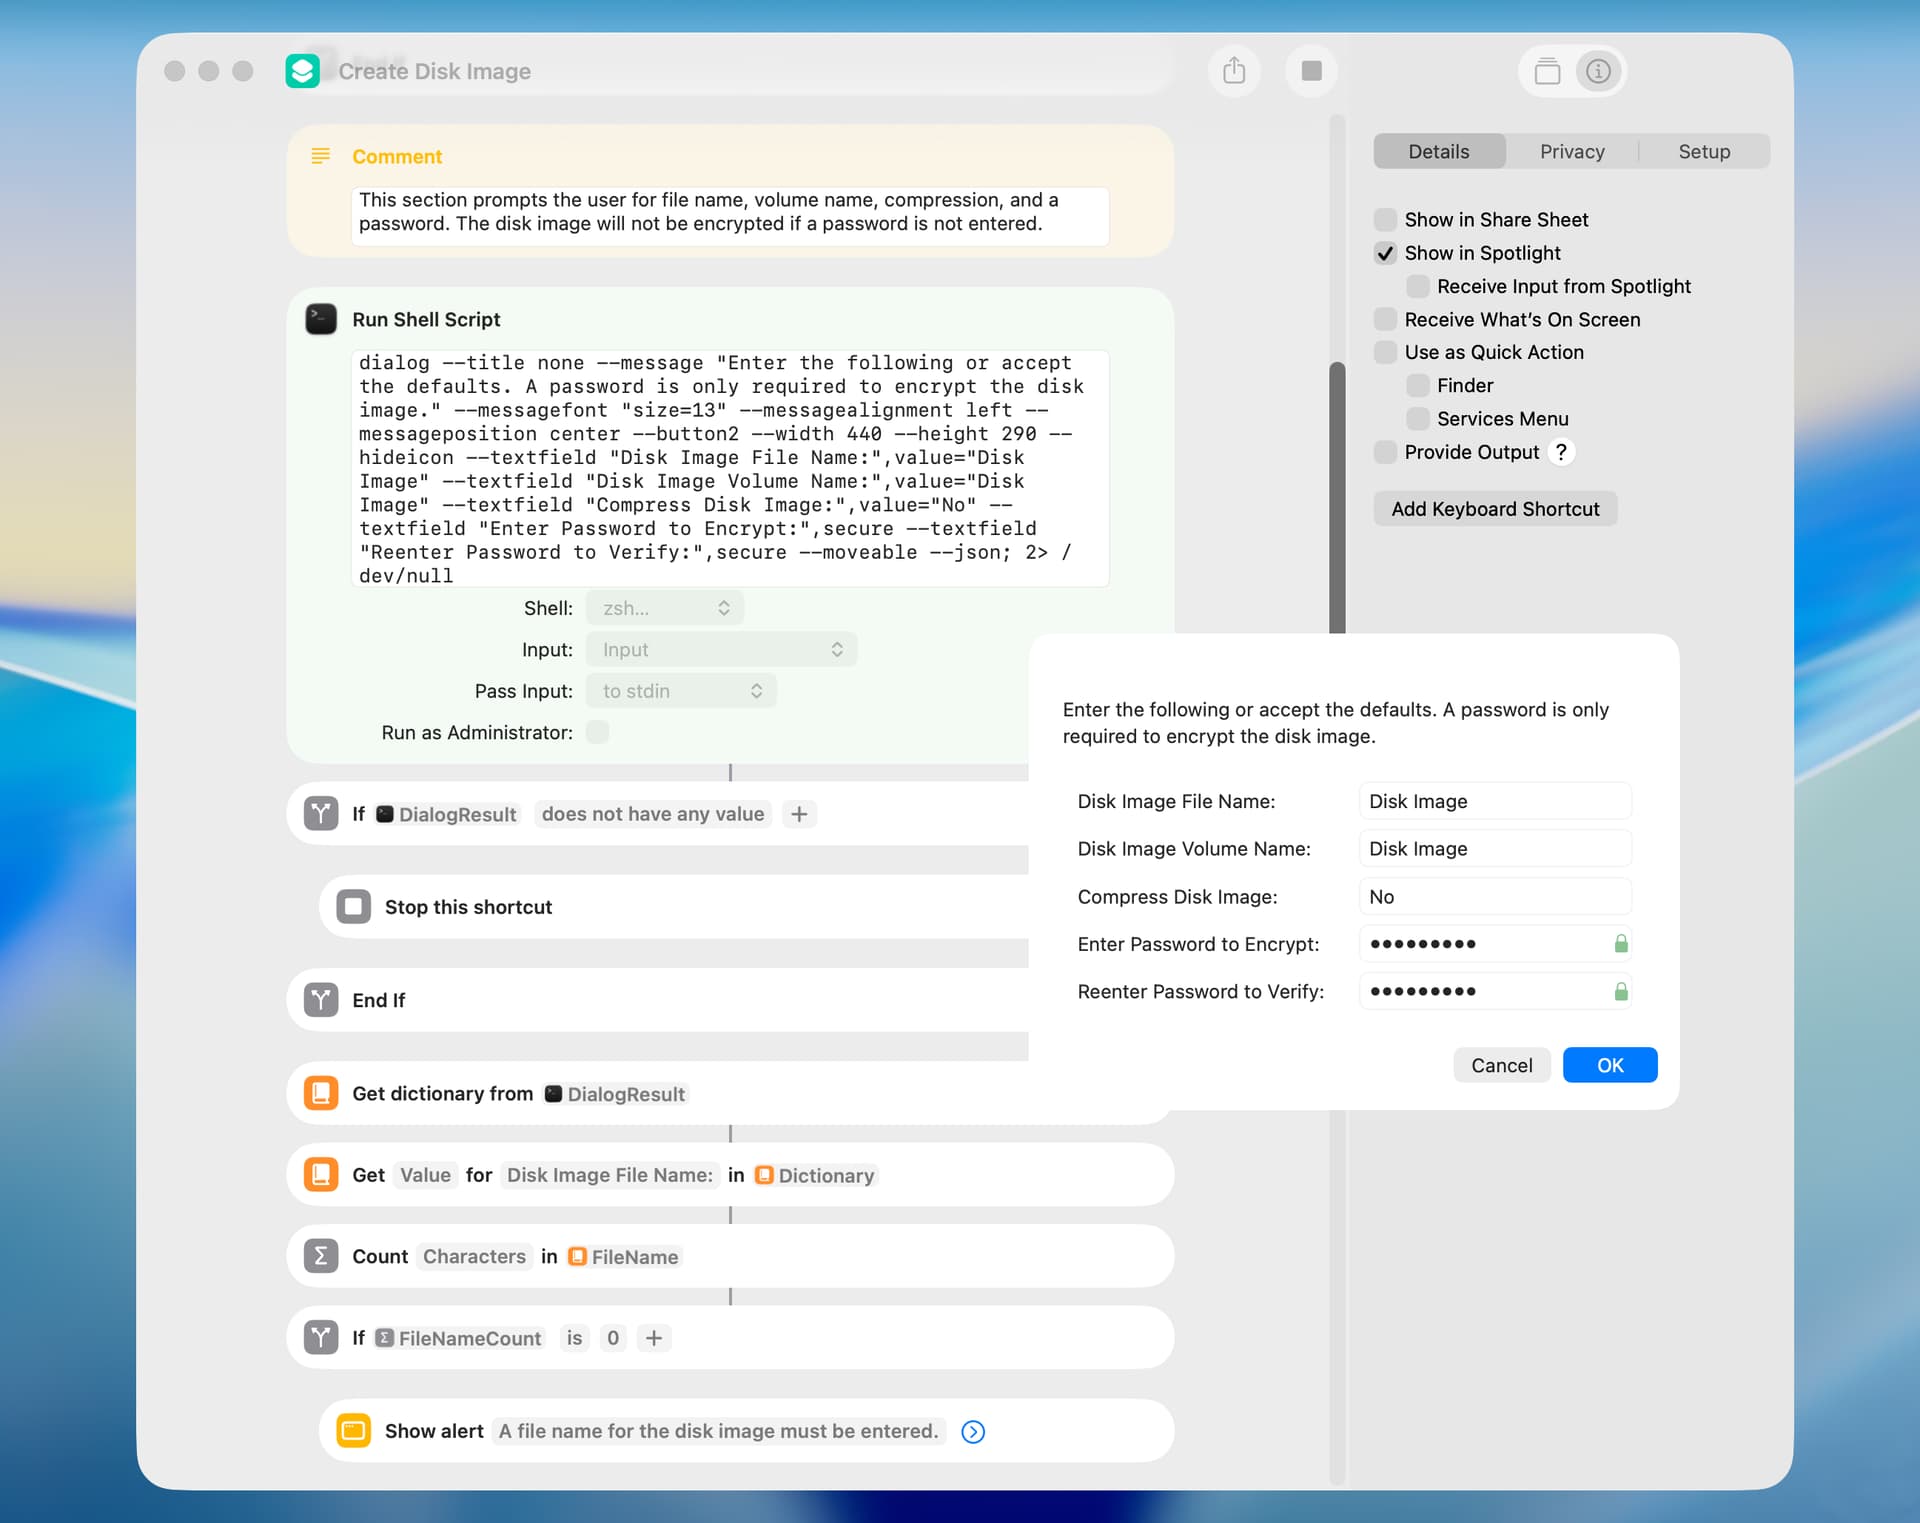
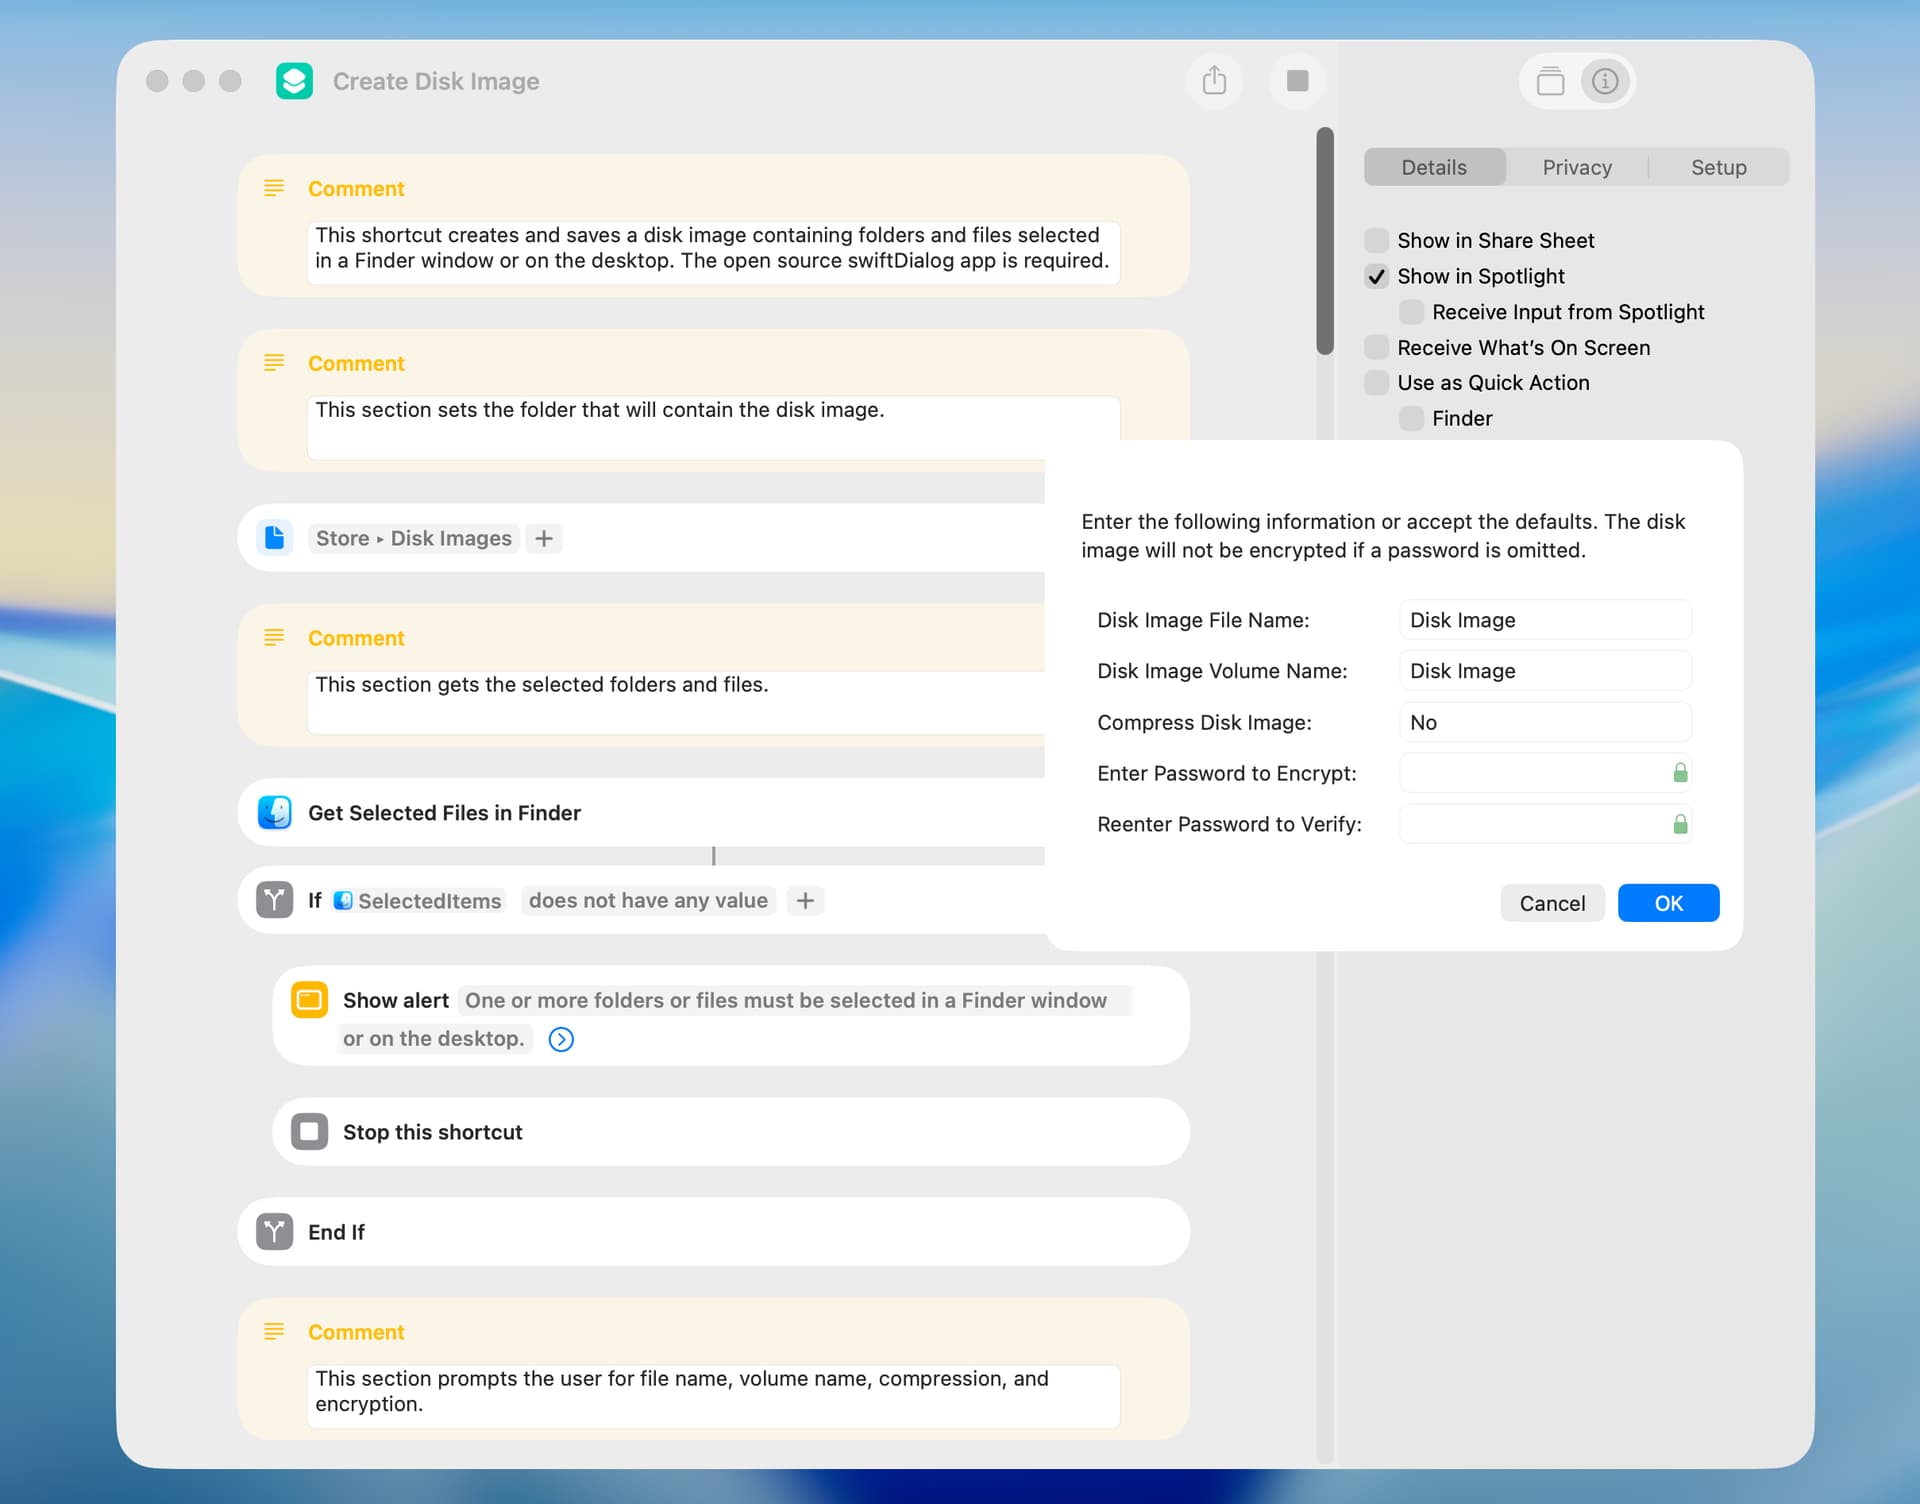
I added a few options to this shortcut and decided to use the swiftDialog app. A few comments:
The swiftDialog app is open source and can be found here.
The compression used is zlib-compressed, which is the default in the hdiutil command. This is easily changed to any format supported by hdiutil, although some formats are not compatible with the srcfolder option.
Enter yes or Yes to compress the disk image. If anything else is entered, the disk image will not be compressed.
The passwords are hidden as they are typed (see screenshot). This can be changed by removing the secure property in the Run Shell Script action.
If a folder or file cannot be included in a disk image, the hidutil command will report an error. I don’t know of a way for the shortcut to trap and report this error.
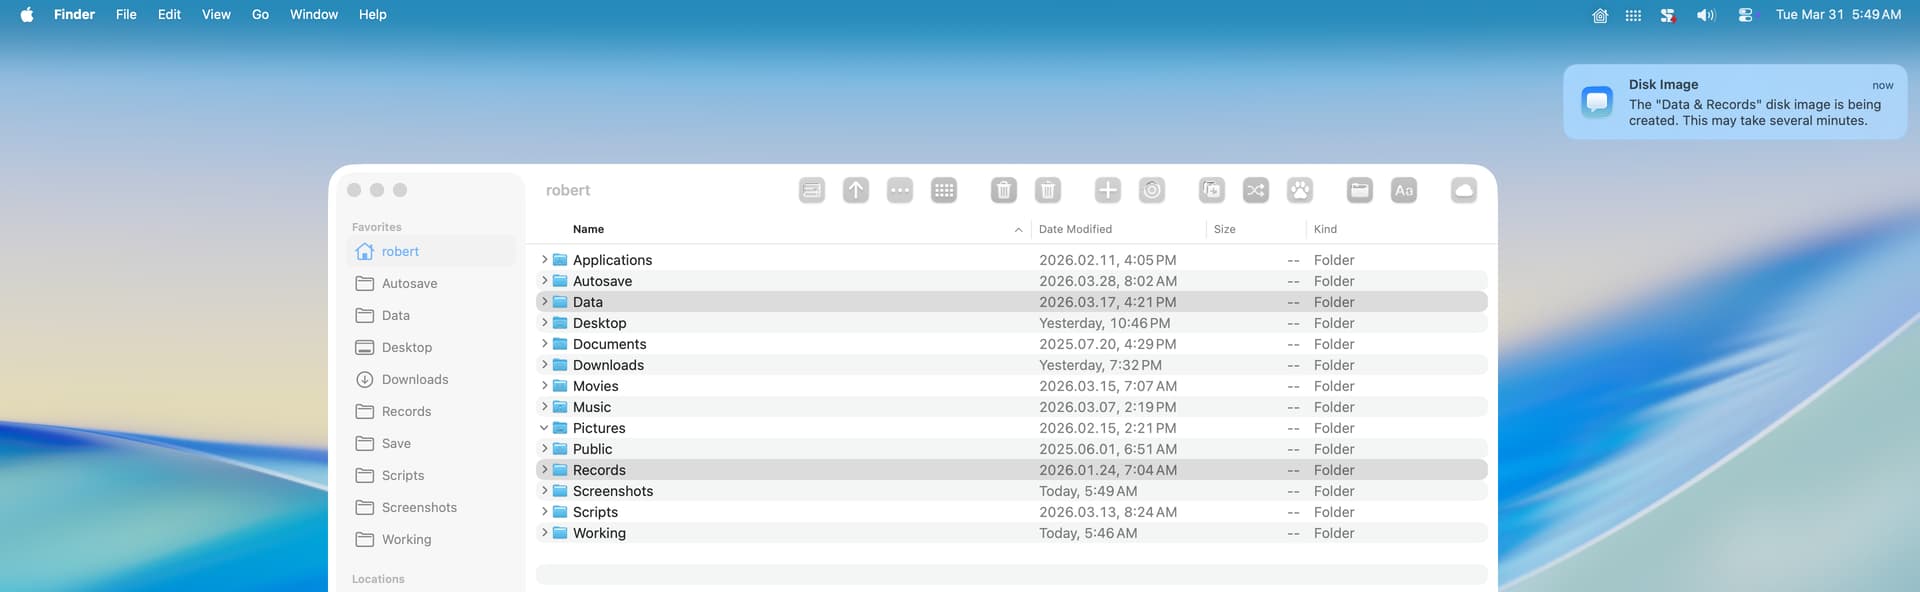
When running this shortcut by way of Spotlight, the shortcut-is-running indicator does not always appear in the menu bar, but the disk image is created as expected. I haven’t encountered this before. The shortcut displays a notification when the disk image is saved.
The user must set the target folder in the File action at the beginning of the shortcut.
The following screenshot only shows a portion of the shortcut.
I tried out your shortcut, chose a different folder on my Desktop as the source, and it seemed to go through all the steps but no disk image was created. I then took a look at the shortcut details and it mentions a “target folder” which I did not initially change. So, my question is, where by default is the disk image created, because I can’t seem to find it anywhere on my system. Thanks.
The target folder is set at the top of the shortcut. Just click on Store > Disk Images and select the desired folder. I’ll edit my earlier post to explain this.
Thank you for the explanation. I also learned something new, at least for me. As I was struggling to add both my source and destination for the disk image to the shortcut I discovered that if you right-click on an element in the shortcut, a delete comes up, which I’m sure is common knowledge to most, but was not to me, so thanks again.
Because of the time it may take to create a disk image, I edited my swiftDialog shortcut to show a progress dialog. Some comments:
It is not possible to know how long it will take to create a disk image, so the progress dialog only indicates that the creation of the disk image is underway.
Hiding the progress dialog does not stop the creation of the disk image.
The position of the dialog on the screen (see screenshot) is set in the Run Shell Script action, and this can be changed. Other options are topleft, left, bottomleft, center, bottom, topright, right, and bottomright.
The user must set the target folder in the File action at the beginning of the shortcut.
I did some additional testing with the currently-supported compression formats on two folders that contained a mixture of PDF, text, AppleScript, and shortcut files. Because PDF files are included and are relatively large in size, the amount of compression is limited.
Compression
Code
Size
No Compression
UDRO
34.8 MB
ADC-compressed
UDCO
28.9 MB
zlib-compressed
UDZO
29.3 MB
lzfse-compressed
ULFO
27.9 MB
lzma-compressed
ULMO
26.9 MB
These tests were on a folder that contained AppleScripts only.
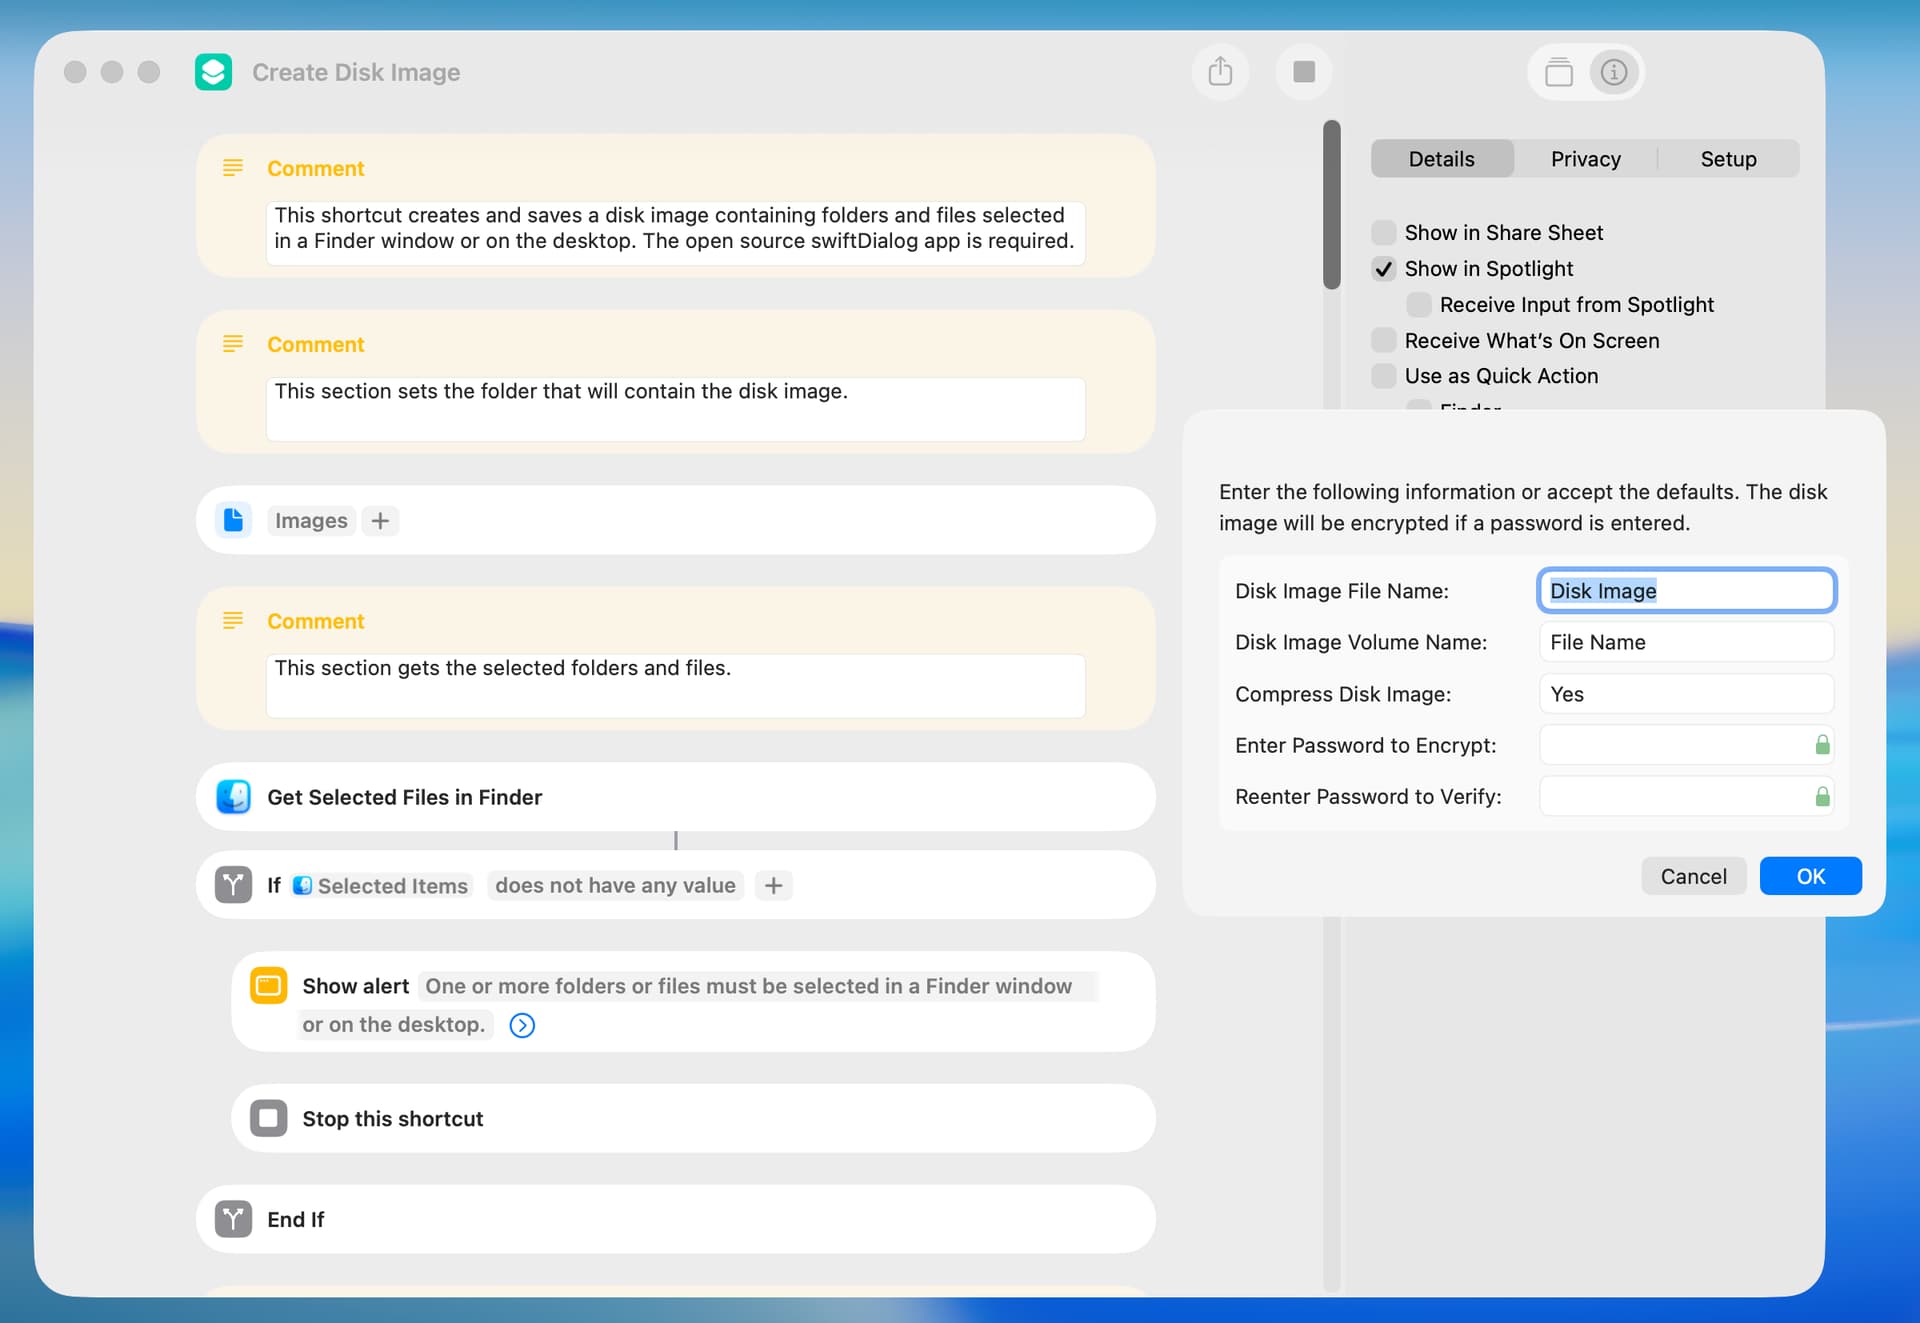
I made some changes to the above shortcuts, and the following shortcut seems most reliable. A few comments:
When the shortcut is installed, the user is prompted to select the folder that will contain the disk image files. This folder can later be changed from within the shortcut.
A progress dialog is shown while the disk image file is being created.
The Compress Disk Image option must be yes or no and is not case sensitive.
Setting the volume name to File Name (the default) will cause the shortcut to use the file name for the volume name.